Product photography is an essential part of online stores. As an e-commerce owner, you know presentation is everything. A high-quality image can boost the conversion rates. Professional product photos are non-negotiable for capturing attention and driving sales in a crowded digital marketplace.
But what if you don’t have a Hollywood-sized budget for a professional photographer? The good news is, you don’t need one. DIY product photography is a powerful and cost-effective solution that puts you in complete creative control. It’s budget-friendly and easy to learn.
This guide will walk you through everything you need to create stunning, high-quality product photos for your online store. From essential gear to expert editing techniques, you’ll learn how to take images that make your products fly off the virtual shelves.
Essential Equipment for Product Photography
Professional product photos don’t need expensive gear or equipment. Mostly in e-commerce photography, the product is placed on a white background. It’s easy to get professional results with some basic and affordable gear. There are only 6 pieces of equipment you need-
A camera is an essential part of product photography. Definitely, you need a camera to shoot the product. There are many options, from a DSLR or mirrorless camera to a modern smartphone. In fact, the latest iPhone and Android devices have incredible cameras that are more than capable of producing beautiful product images. But remember, the lighting setup is far more critical than the camera itself.
Tripod
A tripod is your best friend for stability and consistency. It eliminates camera shake, ensuring your photos are sharp and clear, which is especially important when shooting in natural, low-light conditions. You don’t need to break the bank; many affordable options under $30 will do the job perfectly for a beginner.
Lighting Source
Studio Lighting is the single most important element in photography.
- Natural Light: This is the best and cheapest option available. Setting up next to a large window provides soft, diffused light that makes products look fantastic. But we don’t recommend using natural light.
- Artificial Light or Studio Light: Studio light is perfect for product photography. If you need to shoot at night or want perfectly consistent lighting for every session, consider an affordable ring light or a Softbox kit.
White Background/Sweep
A clean, seamless white background is the industry standard for e-commerce. It removes distractions and puts all the focus on your product. You can easily create this with a roll of white paper or a poster board from a local craft store. By curving the paper from a vertical surface down to your table, you create a “sweep” that eliminates horizons and shadows.
Bounce Cards
Bounce cards are a simple yet powerful tool for controlling light. A white foam board can be used to “bounce” light back onto your product, filling in dark shadows for a clean, even look. A black foam board does the opposite, deepening shadows to add contrast and drama.
Table and Tape
All you need is a stable surface, like a standard folding table, to set up your studio. You’ll also need tape or clamps to secure your white background sweep in place.
How to Take Product Photos on a White Background
After placing the equipment, it’s now time to capture the pro-level product images. We have gathered a total of 5 steps on how to take product photos on a white background. Follow these steps to create clean, professional photos that make your products shine.
- Set Up Your Shooting Area
Position the table at a 90-degree angle. This setup delivers the soft, directional light that is crucial for professional shots. To prevent strange color casts in your photos, turn off all other lights in the room. - Position Your Seamless Sweep
Tape the white paper or poster board to a wall or vertical surface behind the table, allowing it to curve down onto the table. This smooth curve creates a seamless background, eliminating any harsh lines or horizons behind your product. - Dial In Your Camera Settings
Optimize your camera settings for maximum clarity and focus.
-
- White Balance (WB): Set to Auto. Your camera will do a good job of reading the natural light.
- Flash: Turn it Off. The on-camera flash is harsh and creates unflattering glare.
- Image Quality: Choose the highest quality setting. If you have the option, shoot in RAW for maximum editing flexibility. Otherwise, select the largest JPG size.
- ISO: Set your ISO to 100 or 200. This is the camera’s sensitivity to light, and keeping it low minimizes grain and noise in your images.
- Aperture (f-stop): Use a high f-stop number, like f/8 or f/11. This creates a deep depth of field, ensuring your entire product is sharply in focus from front to back.
- Position Your Product and Reflector
Place the product in the center of the sweep. Then, position a white bounce card opposite your light source (the window). Watch how it instantly brightens and fills in the shadows on your product, creating a balanced and evenly lit image. - Shoot and Evaluate Critically
Take photos from several different angles. After you shoot, review the images on a computer screen, not just your camera’s small LCD. Check for sharp focus, proper exposure, and appealing composition. Don’t be afraid to make small adjustments to your setup and shoot again.
Post-Production (Retouching): Perfecting Your Photos
RAW images are not good for online stores. Editing is the final, crucial step to achieving a professional look. A few small tweaks can transform a good photo into a great one. Here are some retouching tips for white background product images
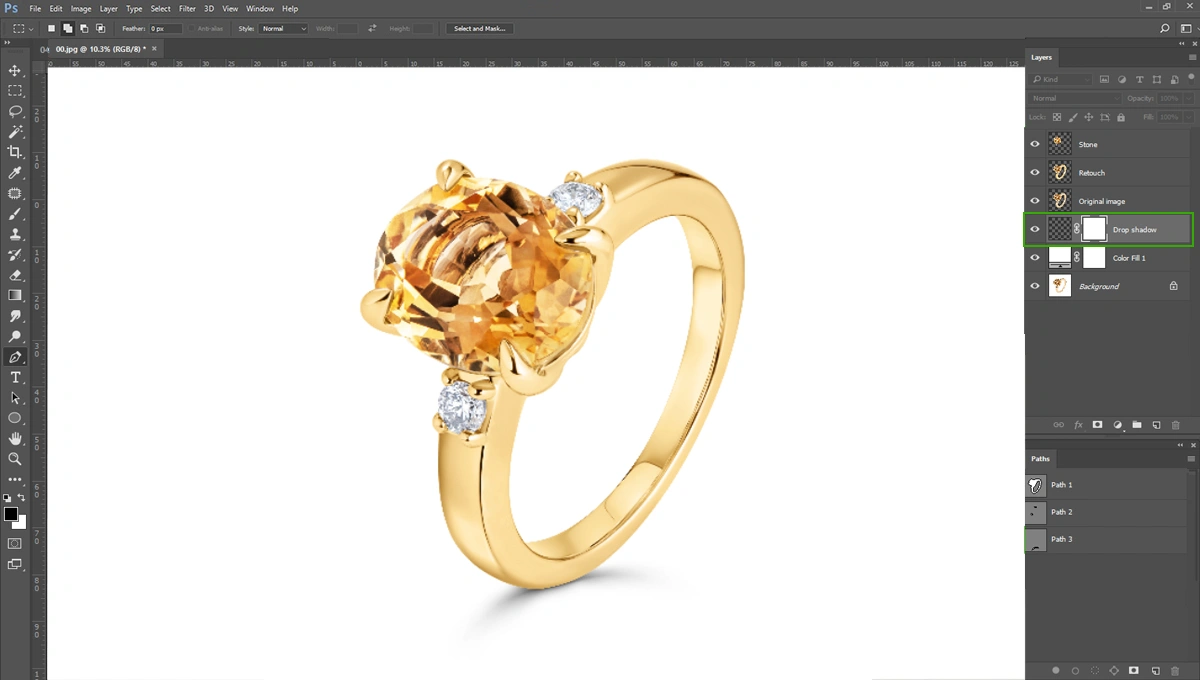
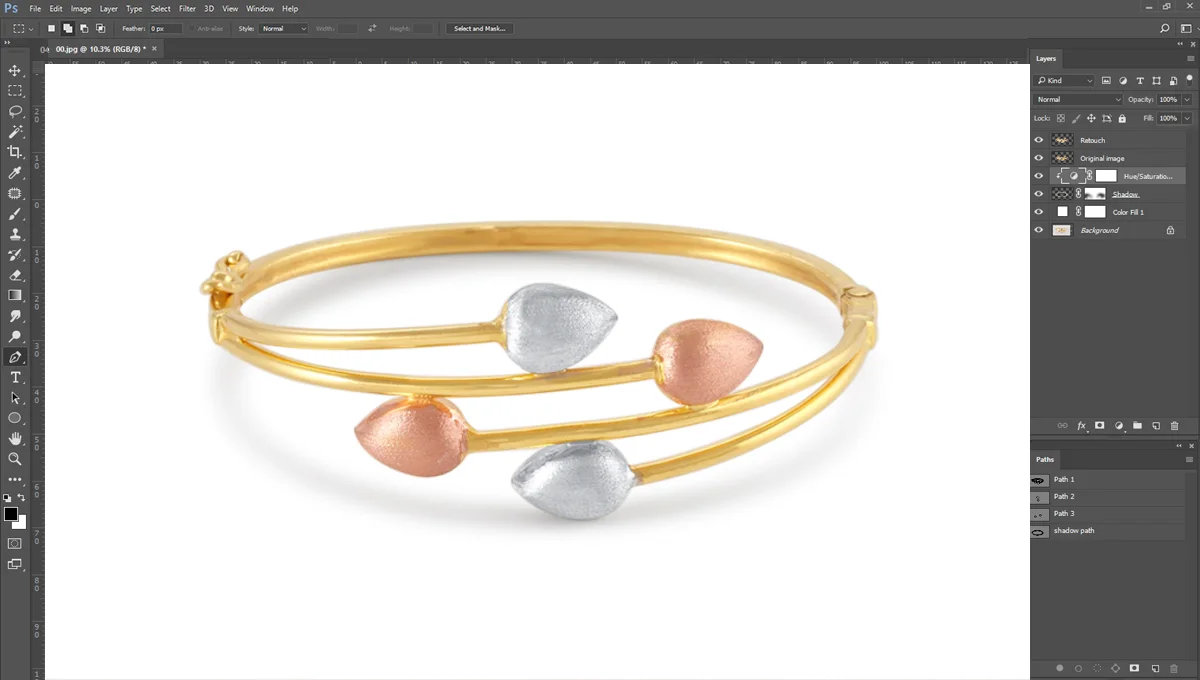
White background RAW images aren’t pure white background. You need to remove the original background of the product and place a pure white background (#FFFFFF). To achieve this, you need to do the clipping path around the product. It’s an easy method in Adobe Photoshop. There are some other options available to remove the background. Canva and other AI tools are providing background removal services.
Retouching Basics
After achieving the pure white background, you’ll notice some distracting dust or blemishes on the product. These need to be removed. There is user-friendly software like Adobe Photoshop that is good for removing these dusts.
Optimizing Images for Your Online Store
Image optimization is critical for site speed and SEO. Large image files can slow down your website, leading to a poor user experience and lower search engine rankings.
- Resizing: Before uploading, find the ideal image dimensions for your specific website theme and resize your photos accordingly.
- Compression: Use a compression tool like TinyPNG or JPEGmini to reduce the file size of your images without sacrificing visual quality.
- File Naming: For an extra SEO boost, name your image files with descriptive, keyword-rich titles. Instead of IMG_2451.jpg, use blue-suede-running-shoes.jpg.
Elevate Your Online Store’s Brand
With the right gear and a solid understanding of these techniques, any online store owner can master DIY product photography. Investing time in creating high-quality images is one of the most effective ways to build trust, attract customers, and ultimately, boost your sales.
Ready to take your product photos from amateur to amazing?
Start applying these product photography tips to your online business today. And if you want to ensure perfect, consistent results every time without the hassle, explore our professional photo editing services to truly elevate your brand.
Frequently Asked Questions
What are the best practices for product photography for an online store?
The best practices include using a clean, consistent background (usually white), ensuring sharp focus and even lighting, showing the product from multiple angles, and optimizing images for fast web loading. High-quality, clear images build trust and help customers make informed purchasing decisions.
How do I get creative with product photography for my online store?
Go beyond the white background by incorporating lifestyle shots that show your product in use. Use props that tell a story, experiment with different angles, and create detailed macro shots to highlight unique features. This helps customers connect emotionally with your products.
Why is high-quality product photography important for online stores?
Since customers can’t physically touch or see products, high-quality photos are their primary tool for evaluation. Great photography builds credibility, reduces hesitation, and increases conversion rates. It’s often the deciding factor between a customer making a purchase or leaving your site.