Jewelry photography is one of the most in-demand skills in the product photography industry. Jewelry products are shiny metal products. It’s hard to do the photo shoot because of the reflective surface. If you have ever tried photographing a ring or necklace, you already know the challenges. Glare on the gold surface or reflection that hides details.
But the good news is that jewelry photography doesn’t always need an expensive camera or a professional studio. A smartphone with some basic lighting and a few smart techniques can be helpful for photographing the jewelry. However, our recommendation is to use a DSLR or a Mirrorless camera.
We have compiled a step-by-step guide on how to photograph jewelry from expert photographers. We have written down everything from simple shooting space to editing the final images. Whether you’re photographing gold, silver, or diamond jewelry for Instagram, your website, or an online shop, you’ll find practical, budget-friendly advice designed specifically for beginners. Let’s get started-
Understanding Jewelry Photography Basics
Jewelry photography is a specialized form of product photography that focuses on capturing small, intricate objects in a way that highlights their details, textures, and appeal. It’s a valuable skill for a beginner photographer to build a portfolio. It is also crucial for launching an e-commerce store or growing a social media presence.
The biggest challenges of this photography are the reflection on the metal surface, capturing the sparkle in gemstones, and maintaining accurate colors across different materials. A slightly off-white can make a difference on the metal surface. Poor lighting can flatten textures or create harsh shadows that obscure details.
In jewelry photography, clean and sharp images are essential. Finally, these images will appear on the website, social media, and ad creative. The audience should see every face of the diamond and the metal finish. This level of clarity builds trust and helps potential buyers feel confident in their purchase.
There are several styles of jewelry photography. White background shots work best for e-commerce and product listings. Lifestyle shots with props or worn by a model will perform well on Instagram and other social media platforms. Creative angles and close-ups tell a brand story and showcase craftsmanship.
Understanding these fundamentals sets the foundation for the steps ahead.
Step 1: Gather the Equipment
As we mentioned earlier, jewelry photography doesn’t need an expensive studio setup. You don’t need to invest thousands of dollars to take great jewelry photos. Here’s what you’ll need to get started:
Camera: A DSLR or Mirrorless camera will be the best choice for jewelry photography. If you have a tight budget, a smartphone with a good camera will work just fine. Many smartphones now include macro modes or portrait settings that can produce surprisingly sharp results. But try to consider buying a professional camera.
Tripod: Stability is the main factor for sharp images. Especially in close-up photography. A basic tripod will reduce the camera shake. It allows shooting at slower shutter speeds if needed.
Macro Lens or Attachment: Jewelry itself is a small product. That’s why we need a macro lens to shoot.” or “A macro lens is essential for this. If you’re using a DSLR, a macro lens helps capture fine details. Smartphone users can invest in an inexpensive clip-on macro lens attachment for similar results.
Lighting: A ring light or LED panel is good for this photography. These are affordable and provide consistent, diffused light that minimizes harsh shadows. For e-commerce photography, where consistency is critical, we recommend avoiding natural light as it changes throughout the day. Artificial lights (like LED panels) offer the control needed for a uniform product catalog.
Backgrounds and Props: White foam boards, black velvet fabric, or simple poster boards create clean backgrounds. Jewelry stands, ring holders, and small props like flowers or fabric add dimension and context.
Reflectors: Small reflectors (or DIY versions made from aluminum foil and cardboard) help bounce light into shadowy areas and reduce harsh contrasts.
Step 2: Set Up Your Photography Space
Create a clean, distraction-free background using white poster boards, foam core, or fabric. Position one board vertically as a backdrop and curve another horizontally to eliminate the visible line where the background meets the surface. This creates a seamless, professional look.
Position the lighting to minimize harsh shadows and unwanted reflections. If you’re using artificial lights, position them on either side of the jewelry at equal distances to create balanced, even lighting.
For smartphone users, stability is key. Use a tripod or stack books to create a steady platform. Position the phone at eye level with the jewelry, or slightly above for a flattering angle.
A simple lighting diagram for beginners:
- Place the jewelry in the center
- Position the main light source (LED panel) at 45 degrees to the left
- Add a reflector on the right side to bounce light back and fill in shadows
- Keep the camera directly in front, elevated slightly above the jewelry
This setup works for most jewelry types and can be adjusted based on the specific piece you’re photographing. If you wanted to know more you can read the product photography setup.
Step 3: Master Lighting Techniques
Lighting is everything in jewelry photography. The goal is soft, diffused light that reduces glare on metallic surfaces and highlights details without creating harsh shadows.
Natural Light vs. Artificial Light: Natural light is ideal for beginners because it’s free, but for ultimate control and consistency, you will need artificial light (like ring lights or LED panels). This type of light offers more control and consistency.
Setting Up a Simple One-Light or Two-Light Setup:
For a one-light setup, position the light source at a 45-degree angle to the jewelry. Use a white reflector on the opposite side to bounce light back and reduce shadows.
For a two-light setup, place lights on both sides of the jewelry at equal distances and angles. This creates even, balanced lighting with minimal shadows.
Photographing Gold Jewelry: Use warm lighting to complement gold’s natural tones. Avoid overexposing highlights, which can wash out details. Adjust your white balance to “cloudy” or “shade” if shooting in natural light to enhance warmth.
Photographing Silver Jewelry: Balance cool tones carefully. Silver is highly reflective, so manage reflections by adjusting the angle of your lights or using a polarizing filter. Soft, diffused lighting works best.
Photographing Diamond Jewelry: Capture sparkle by positioning lights at an angle that highlights the gemstone’s facets. Shoot from multiple angles to showcase brilliance and fire. Macro photography is essential for close-up detail shots that reveal the stone’s clarity and cut.
Experiment with different lighting positions and intensities until you find what works best for each piece.
Step 4: How to Make a Light Box for Photographing Jewelry
A DIY light box is an affordable tool that delivers consistent, professional results. It diffuses light evenly, eliminates harsh shadows, and creates a clean, distraction-free environment.
Materials Needed:
- A medium-sized cardboard box
- White tissue paper or parchment paper
- White poster board or paper
- Tape
- LED lights or desk lamps
Instructions:
- Cut large rectangular windows on three sides of the box (left, right, and top), leaving about an inch of border on each side for stability.
- Tape white tissue paper or parchment paper over each window to diffuse the light.
- Line the inside of the box with white poster board or paper to create a seamless white background.
- Position your jewelry inside the box on a small stand or flat surface.
- Place LED lights or desk lamps outside the box, shining through the diffused windows.
The result? Soft, even lighting with minimal shadows and a perfectly white background.
This setup works especially well for e-commerce product photography, where clean, uniform images are essential.
Step 5: How to Photograph Jewelry with a White Background
White backgrounds are the gold standard for e-commerce and website listings. They keep the focus on the product, look professional, and meet the requirements of most online marketplaces.
Camera Settings:
- Aperture: Set to f/8 to f/11 for sharpness and depth of field
- ISO: Keep it low (100–200) to minimize noise
- Shutter Speed: Adjust based on lighting; use a tripod to avoid blur at slower speeds
Position the jewelry flat or on a stand to avoid shadows. If shooting flat, ensure the piece is centered and evenly lit. If using a stand, angle it slightly to add dimension.
To achieve a pure white background in-camera, slightly overexpose your shot. If the background isn’t perfectly white, you can clean it up in editing (more on that in Step 9).
Smartphone Tips:
- Use portrait mode to blur distractions and keep focus on the jewelry
- Adjust exposure manually by tapping on the jewelry and sliding the exposure bar up
- Shoot in a well-lit area to avoid grainy images
White background photography is simple, repeatable, and perfect for creating a cohesive product catalog.
Step 6: Capture Different Jewelry Types
Different materials require different approaches. Here’s how to photograph gold, silver, and diamond jewelry effectively.
How to Photograph Gold Jewelry
Gold’s warm tones and luster can be tricky to capture without washing out details. Use soft lighting to avoid overexposure. Adjust your white balance to “cloudy” or “shade” to enhance the warmth. Shoot from flattering angles that highlight texture and shine without creating harsh reflections.
How to Photograph Silver Jewelry
Silver is highly reflective, so managing glare is key. Use polarizing filters or adjust the angle of your lights to reduce unwanted reflections. Soft, diffused lighting works best. Add contrast in editing to make details pop, but be careful not to lose the bright, cool appearance that defines silver.
How to Photograph Diamond Jewelry
Capturing sparkle requires strategic lighting placement. Position lights at an angle to highlight the gemstone’s facets. Shoot from multiple angles to showcase brilliance and fire. Use a macro lens to capture close-up detail shots that reveal clarity, cut, and craftsmanship.
Each material has its quirks, but with practice, you’ll learn how to bring out the best in every piece.
Step 7: How to Photograph Jewelry for Instagram
Instagram is all about eye-catching compositions and creative styling. Jewelry photos for social media should feel relatable, visually appealing, and on-brand.
Tips for Instagram-Worthy Jewelry Photography:
- Use props, textures, and colors to create visually interesting posts. Think flowers, fabric, marble surfaces, or hands wearing the jewelry.
- Natural light is your best friend. Shoot near a window during the day for soft, flattering light.
- Consider lifestyle settings—jewelry styled on a model, placed on a coffee table, or paired with everyday objects—to create context and connection.
- Optimal image dimensions: 1080 x 1080 pixels for feed posts, 1080 x 1920 pixels for stories.
- Edit for consistency. Use the same filters, color tones, and editing style across your feed to create a cohesive aesthetic.
Examples of successful Instagram jewelry photography often include flat lays, hands modeling rings or bracelets, and close-up detail shots that highlight textures and sparkle.
Engage your audience by telling a story with your images. Share the inspiration behind a piece, the materials used, or the meaning behind a design.
Step 8: How to Photograph Jewelry for Your Website
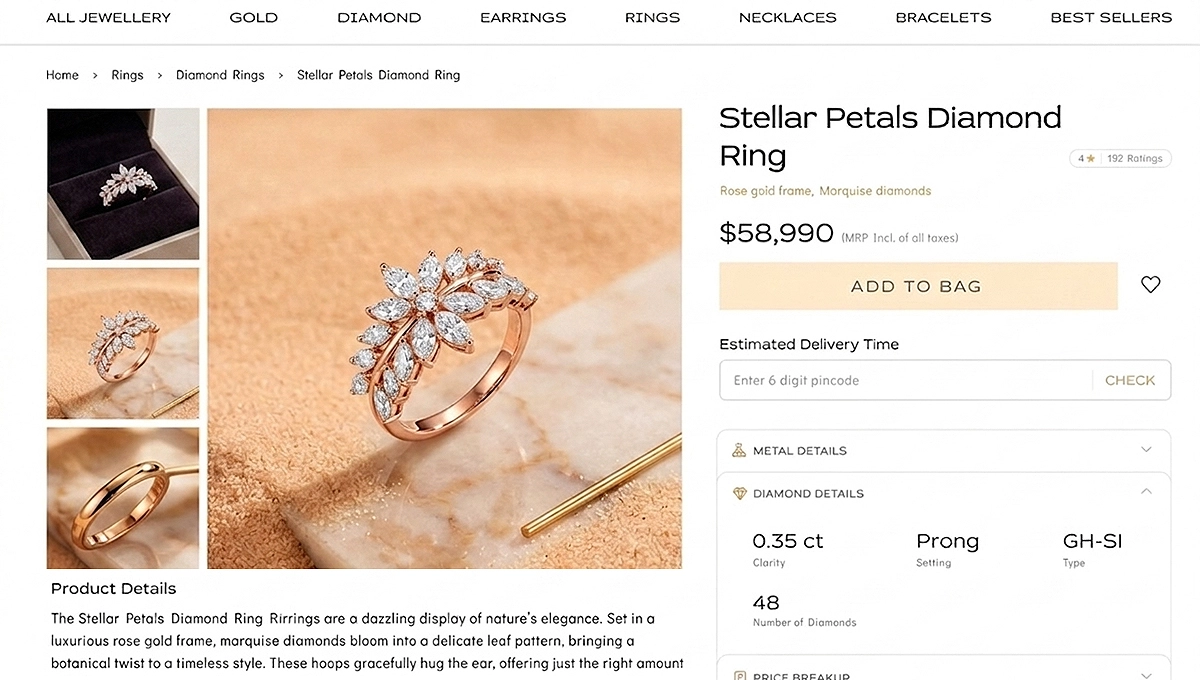
Website product images need to be clear, consistent, and professional. Your goal is to give customers a complete view of the product so they can make informed purchasing decisions.
Best Practices:
- Shoot multiple angles: front, side, back, and close-up detail shots.
- Use uniform backgrounds and lighting to create a cohesive look across your product catalog.
- Include a sense of scale by photographing jewelry on a model or next to a common object (like a coin or ruler).
- Optimize file sizes for web use without sacrificing quality. Save images as JPEGs and aim for file sizes under 200 KB.
Consistency is key. Use the same setup, lighting, and editing style for every product to create a polished, professional look that builds trust with your audience.
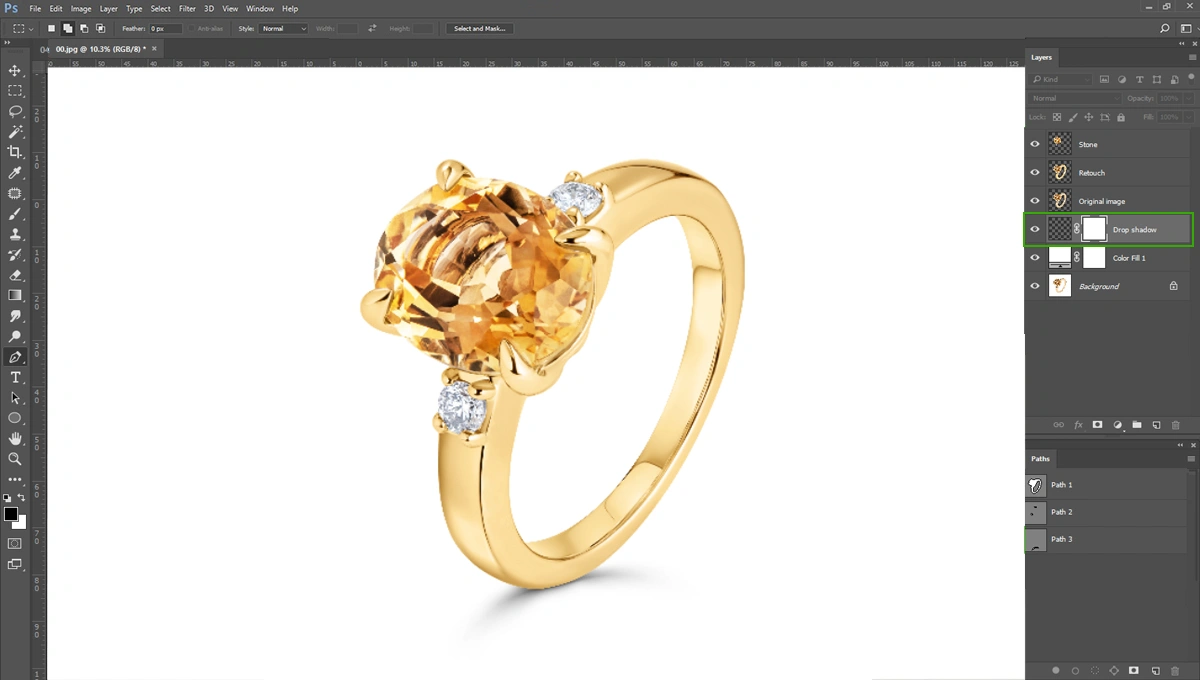
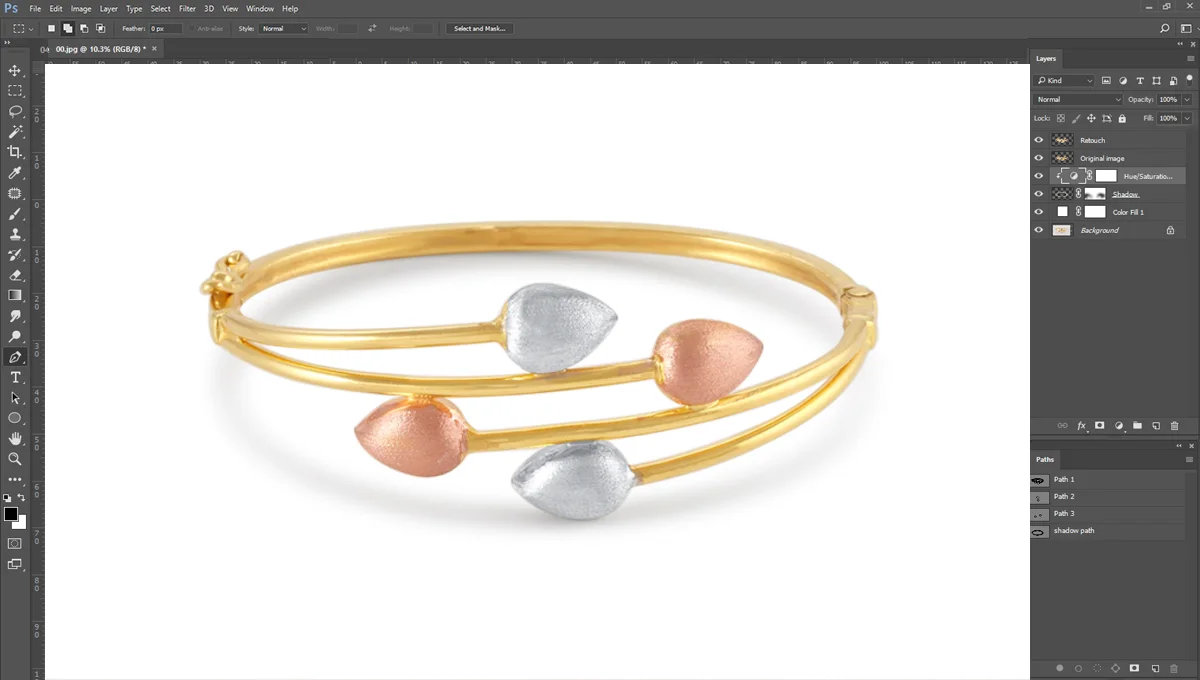
Step 9: Edit the Jewelry Photos
Editing is where good photos become great. Even the best-lit images benefit from a few adjustments.
Beginner-Friendly Editing Tools:
- Lightroom Mobile (free and paid versions)
- Snapseed (free)
- Canva (free and paid versions)
- GIMP (free desktop option)
Step-by-Step Editing Tips:
- Adjust Brightness and Contrast: Brighten shadows and add contrast to make details pop.
- Sharpen Details: Use the sharpening tool to enhance textures and edges.
- Correct Colors: Adjust white balance to ensure accurate representation of gold, silver, or gemstone colors.
- Remove Distractions: Use the spot removal or healing tool to clean up dust, fingerprints, or background imperfections.
- Achieve a Pure White Background: Increase exposure on the background or use masking tools to isolate and brighten it.
Smartphone Editing Tips:
- Use the “Selective” tool in Snapseed to adjust specific areas without affecting the entire image.
- Adjust highlights and shadows separately for more control.
- Use the “Details” tool to enhance sharpness and structure.
Maintain authenticity. Over-editing can misrepresent the product and lead to disappointed customers. Aim for polished and accurate, not overly stylized.
Step 10: Review and Refine the Work
Take a step back and check all the images. Compare them with professional examples and identify areas for improvement. Is the jewelry in sharp focus? Are there distracting elements in the background?
Seek feedback from online photography communities or social media groups. Constructive criticism helps you grow and refine your skills.
Quality Checklist:
- ✅ Sharpness: Details are crisp and in focus
- ✅ Accurate Colors: Materials are represented truthfully
- ✅ Minimal Distractions: Background is clean and uncluttered
- ✅ Proper Exposure: No blown-out highlights or overly dark shadows
Celebrate small wins. Every photo you take is an opportunity to learn and improve. Practice consistently, experiment with different techniques, and don’t be afraid to try new things.
Start Creating Stunning Jewelry Photos Today
You’ve learned how to gather affordable equipment, set up a simple shooting space, master lighting, build a DIY light box, photograph different jewelry types, and edit your images like a pro. Jewelry photography might have seemed intimidating at first, but with the right guidance and a bit of practice, it’s a skill anyone can master.
Start practicing immediately, even if all you have is a smartphone and a window. The best way to improve is to shoot, review, adjust, and shoot again.
Share the jewelry photography on social media and join online communities for feedback and support. Learning from others and celebrating progress together makes the journey more rewarding.
Remember that every professional photographer started exactly where you are now. Capture the sparkle. Master the basics. Share your vision.
Frequently Asked Questions
What camera settings are best for jewelry photography?
Use an aperture of f/8 to f/11 for sharpness, ISO 100–200 to minimize noise, and adjust your shutter speed based on lighting. A tripod helps avoid blur at slower speeds.
How do I reduce reflections when photographing jewelry?
Adjust the angle of your lights, use a polarizing filter, or diffuse your light source with white tissue paper. Reflections are especially common with silver and diamond jewelry.
Can I photograph jewelry with just my smartphone?
Absolutely. Modern smartphones produce sharp, high-quality images, especially when paired with good lighting and a tripod. Use portrait mode or a clip-on macro lens for close-ups.
What’s the best background for jewelry photos?
White backgrounds are ideal for e-commerce and websites because they’re clean, professional, and meet marketplace requirements. Black velvet works well for high-contrast, dramatic shots.
How do I capture sparkle in diamond jewelry?
Position your light source at an angle to highlight the gemstone’s facets. Shoot from multiple angles and use a macro lens to capture close-up details.