High-end jewelry photo editing is crucial for e-commerce brands. Selling jewelry online requires more than just a beautifully crafted product. The jewelry niche is fiercely competitive, and shoppers can not physically touch or try the product online.
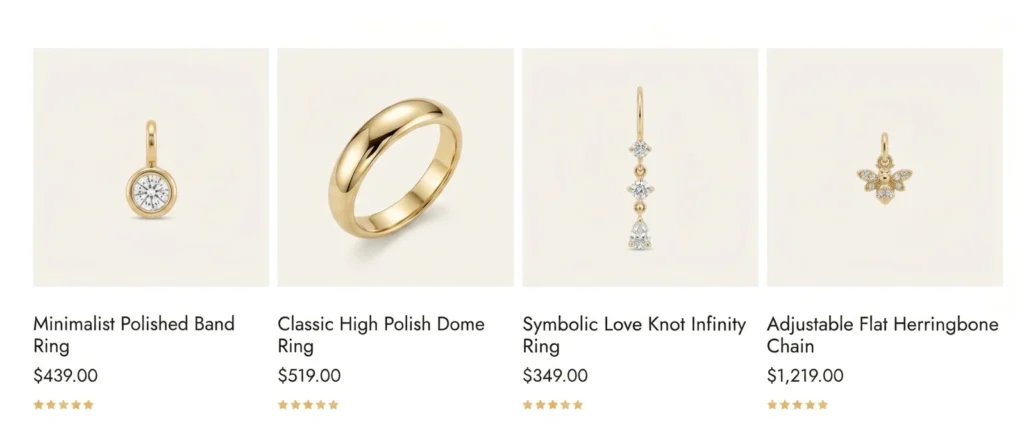
That’s why high-polish jewelry images can serve as the primary driver for online sales. Without a high-quality jewelry photo, the most exquisite diamond ring can easily go unnoticed.
Learning the fundamentals of jewelry photo editing in Photoshop is critical for anyone looking to succeed in this space. A high-polish jewelry photo can easily attract the buyer’s attention.
When buyers see brilliant gemstones and perfectly polished metals, they immediately associate that visual quality with the brand’s overall value. This level of presentation builds essential trust with online buyers who need absolute confidence before making a high-ticket purchase.
We at Glossy Retouching edit thousands of jewelry photos every month. We understand that product photographers and e-commerce business owners understand the constant pressure to deliver exceptional images quickly.
You need fast turnaround times to get new collections online. But the balance between speed and quality is the mark of a highly effective retouching workflow.
So, I’m going to share my exact workflow, how to do high-polish jewelry photo retouching using Photoshop. I’ll cover a complete step-by-step workflow for jewelry photo editing, highlight common pitfalls that can ruin a great image, and share expert tips to optimize your process
By the end of this post, you’ll understand how you can do high-quality jewelry photo editing in Photoshop. But before that, there’s one question that arises. Which is why I need professional jewelry retouching. Why is it essential? Let’s dive into this first.
Why High-polish Jewelry Retouching is Essential?
High-polish jewelry photos are direct correlation between optimized visual content and increased conversion rates in online retail.
When a customer lands on a product page, the main image acts as their virtual magnifying glass. Any blurriness, dullness, or dirt on diamonds can immediately detract from the purchasing experience.
High-quality jewelry images can keep buyers on the page longer and significantly increase sales online.
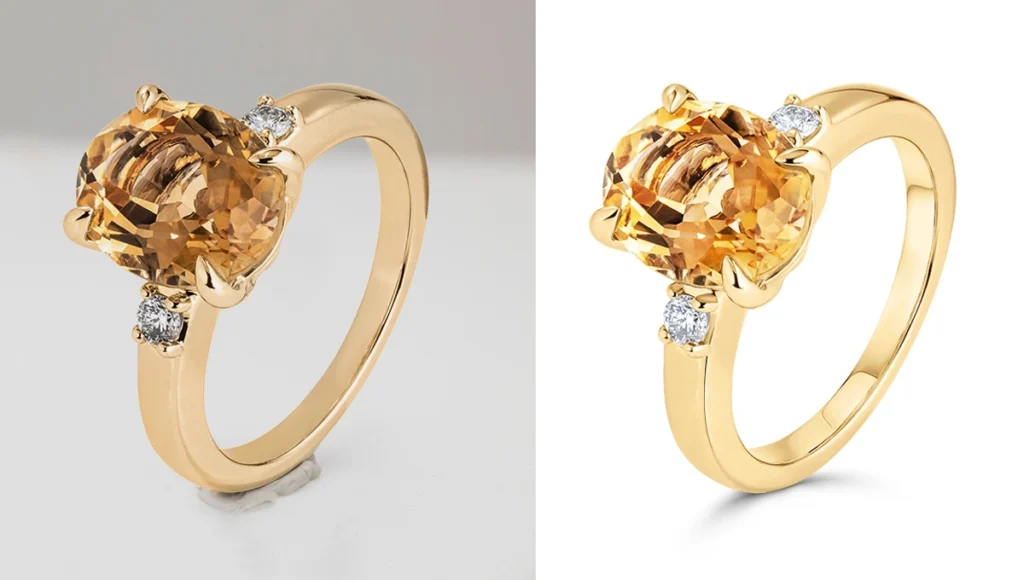
When a commercial photographer shoots jewelry with raw images, it rarely captures the true brilliance of the jewelry. When they did focus stacking and checked the jewelry photos, they had dull metal, lighting issues, dust in the diamond, etc.
Even when shot using advanced camera bodies and top-tier studio lighting equipment, unedited jewelry photos often look flat. The camera simply cannot process light and color exactly the way the human eye does, making post-production an absolute necessity rather than an optional enhancement.
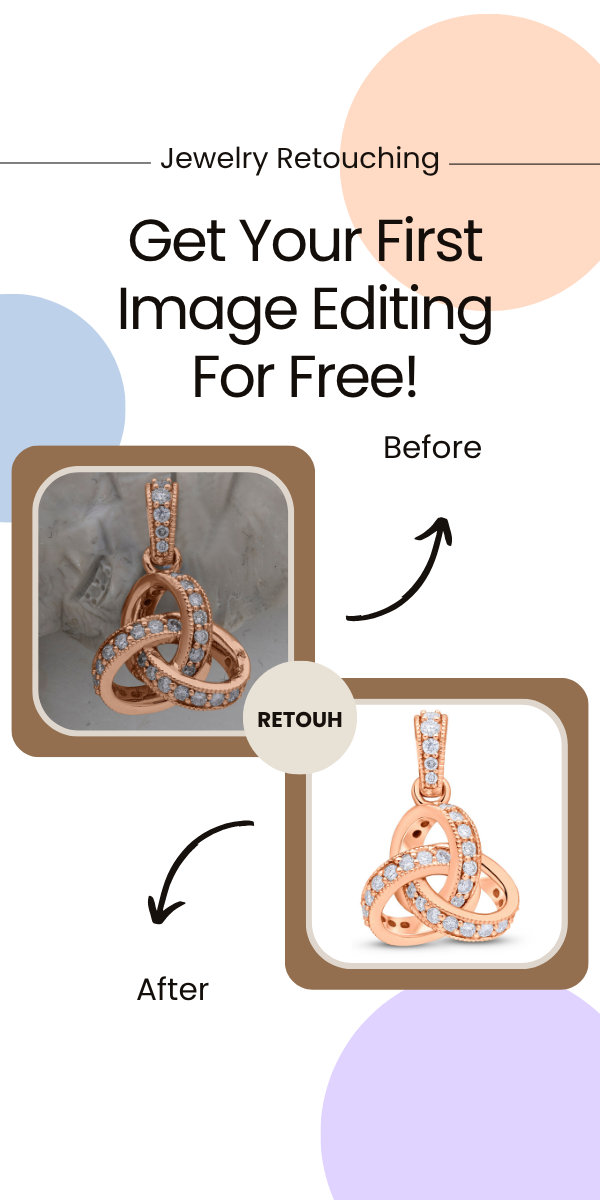
For these reasons, jewelry photos always need high-polish retouching. Look at the image below and see the difference.
Now let’s get into the guide.
Step-by-Step Guide to Professional Jewelry Photo Editing in Photoshop
I’m going to share my exact workflow, how I do high-polish jewelry retouching in Photoshop. It’s easy to understand. I’m always following 6 steps for jewelry retouching. Here they are-
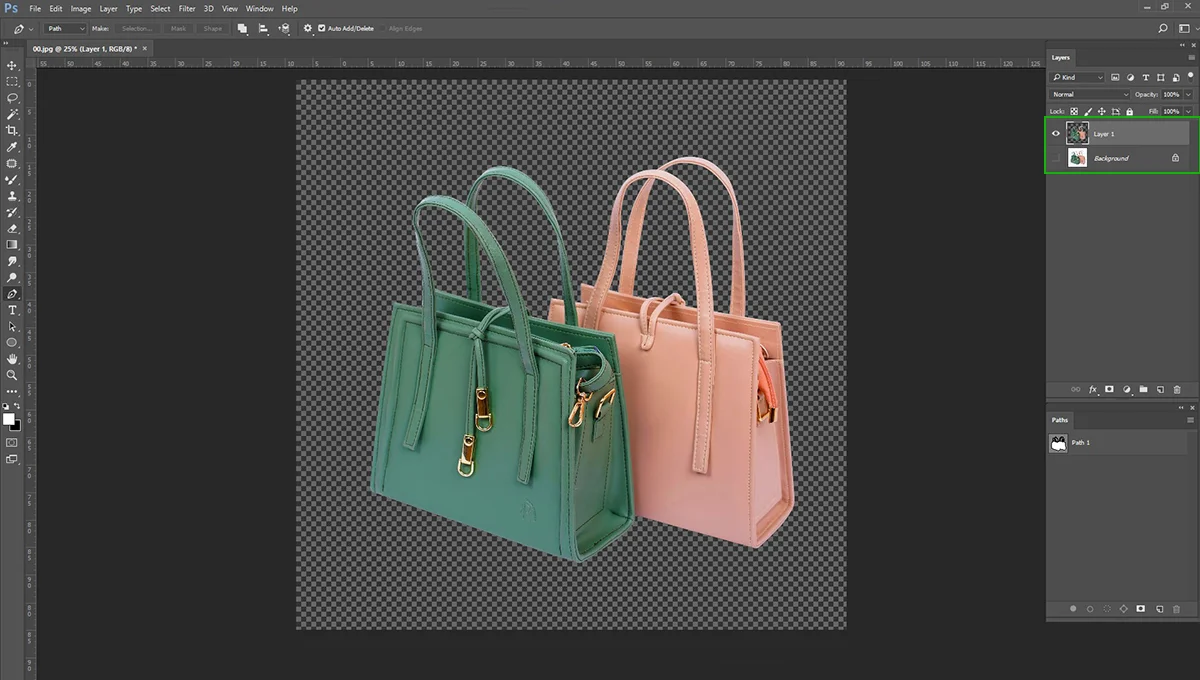
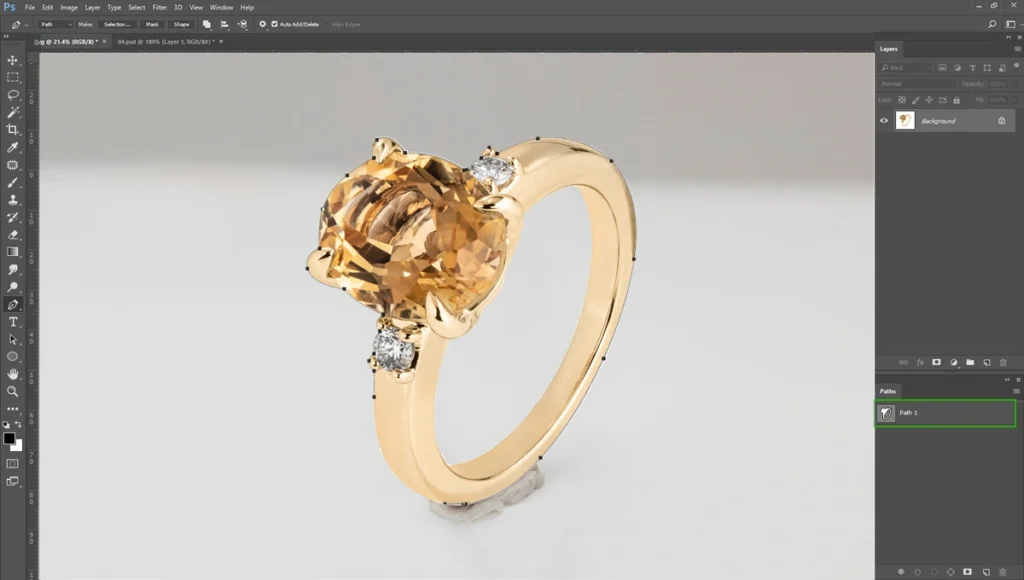
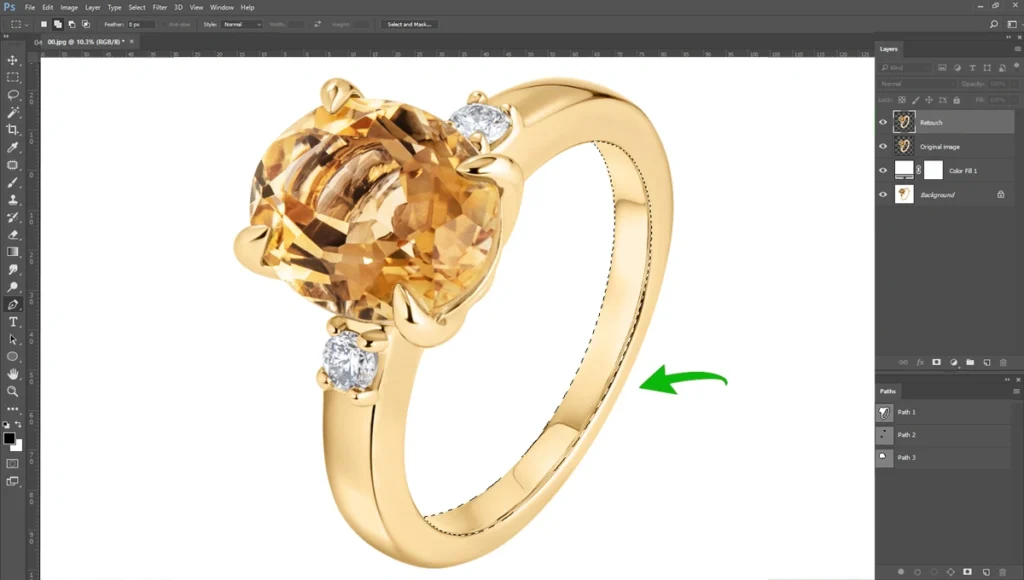
Step 01: Transparent background and Isolation
The first active step in retouching jewelry is separating the piece from its original background. We have to make the jewelry with a transparent background. The Pen Tool is the industry standard for creating precise clipping paths. While automated selection tools have improved, they often struggle with the intricate edges, prongs, and delicate chains found in fine jewelry.
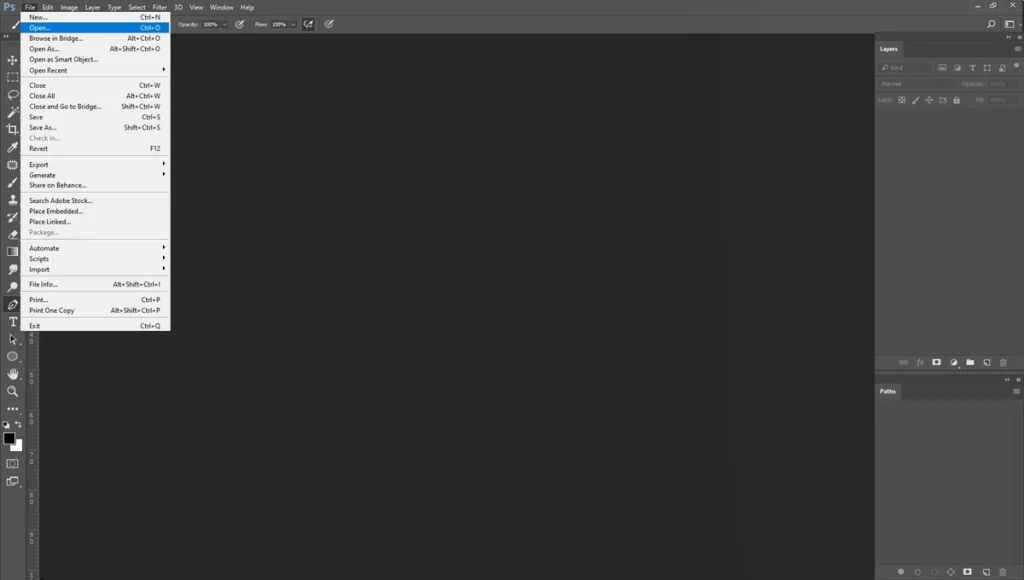
First, open the photo in Photoshop. Simply go to “File” and select “Open”.
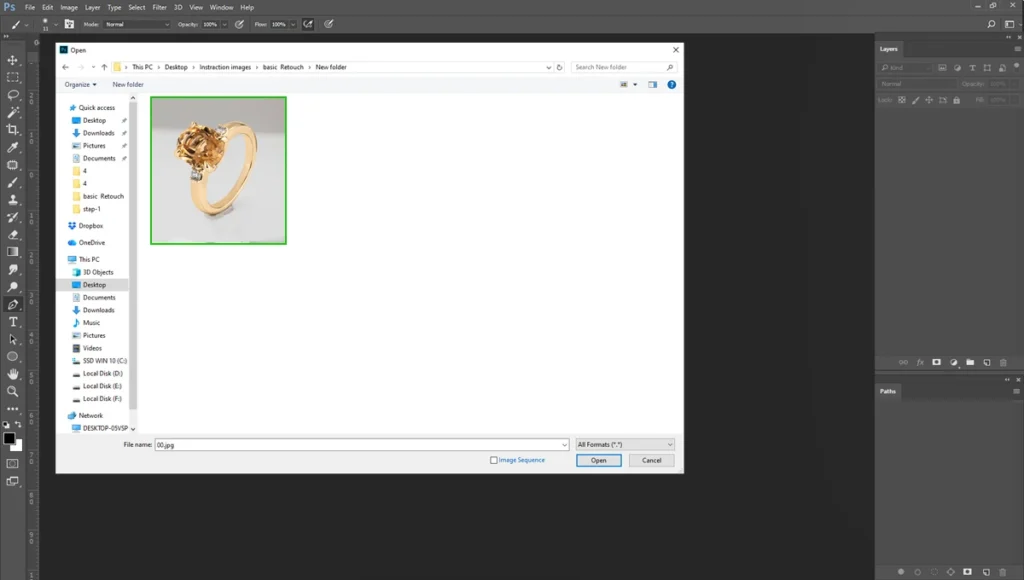
Select your folder and open the jewelry photo.
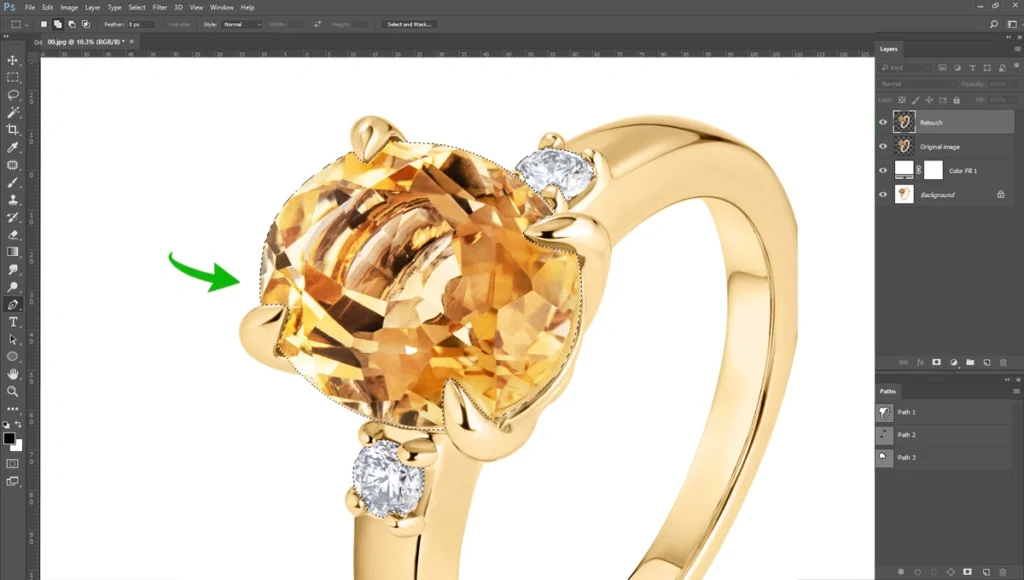
Make clipping path around the jewelry.
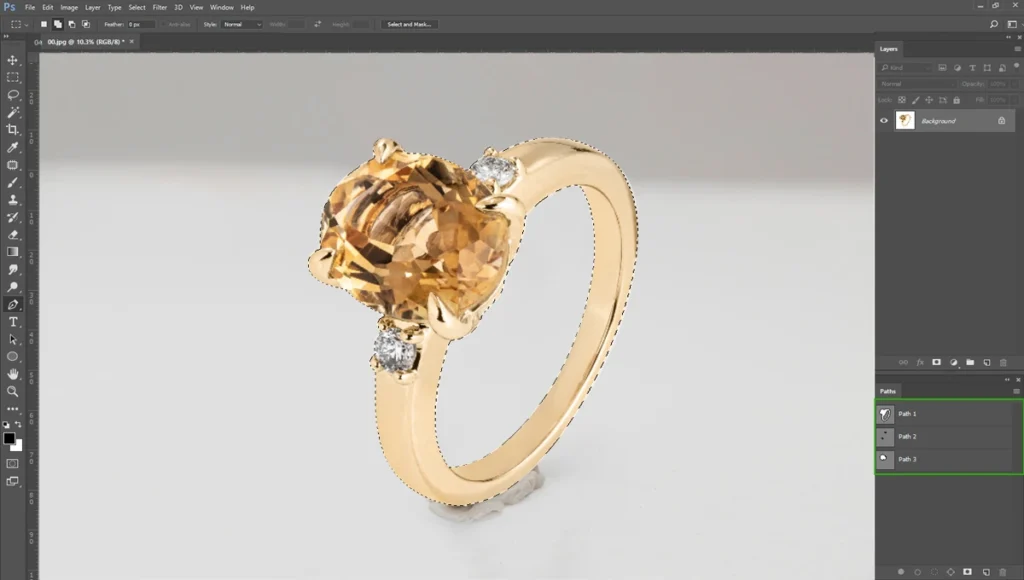
Then, make the selection using the path
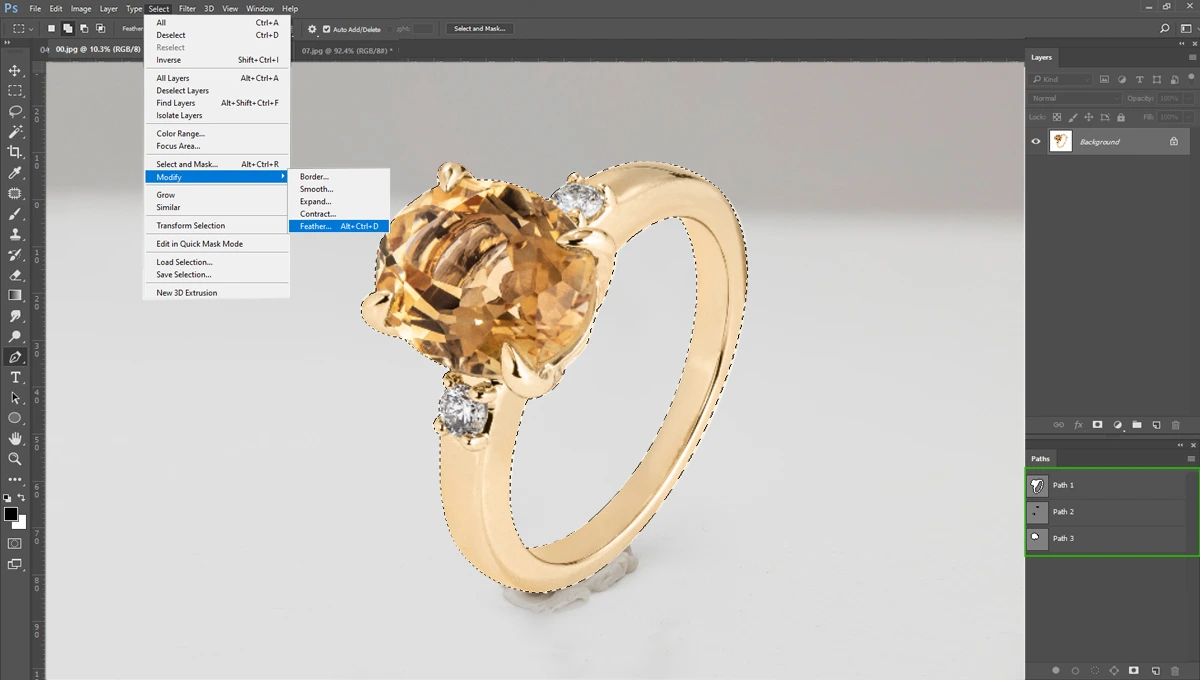
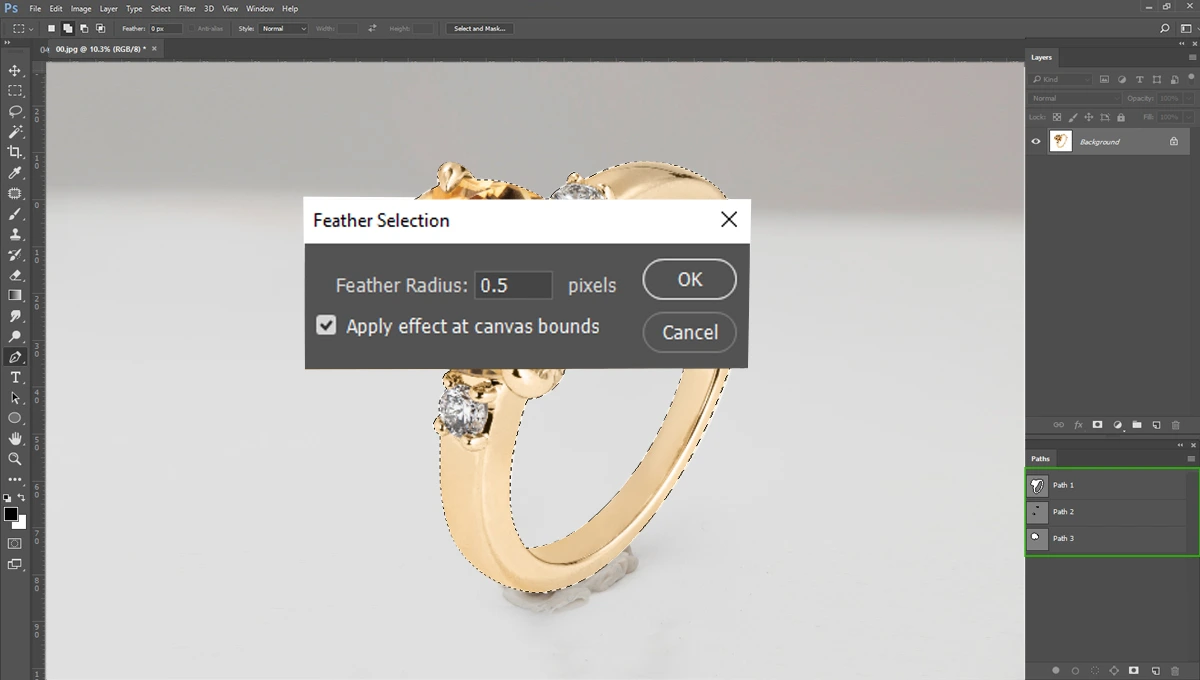
Now go to “Select > Modify > Feather” and select the feather radius 0.5 pixels. Keep in mind, don’t use radius more than 1 pixels. It’ll be over smoothly.
Make the background transparent and create the layer as shown below.
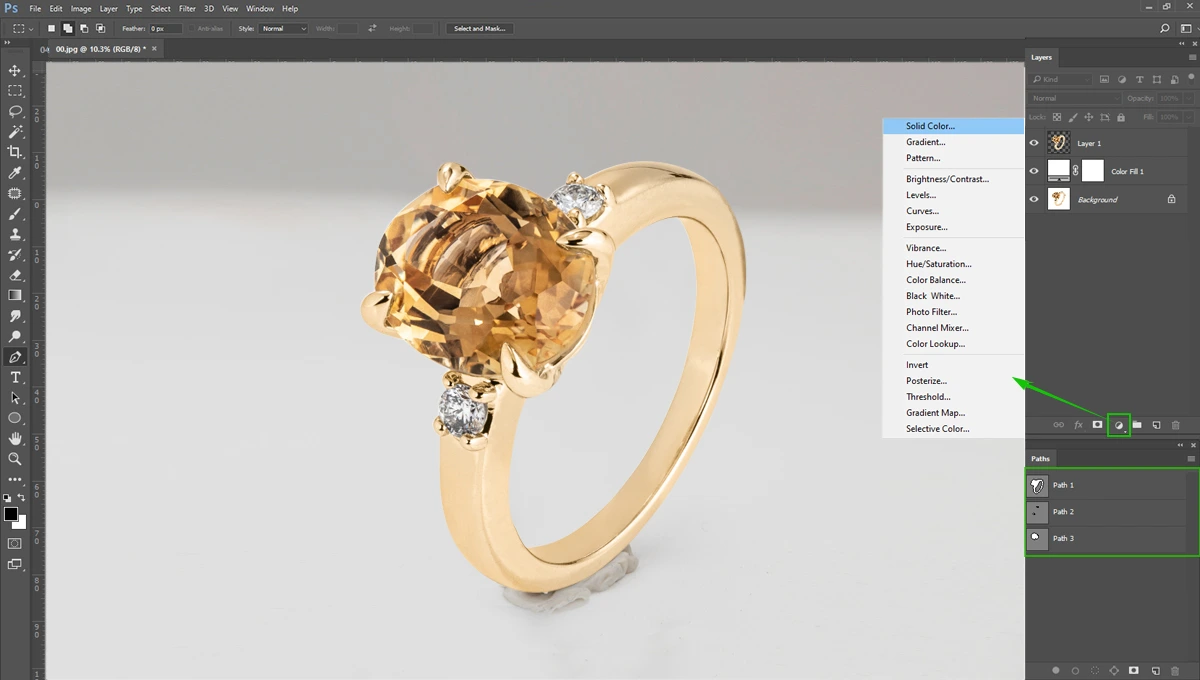

Remember to add a white background layer underneath the transparent jewelry layer. Please keep another layer called” Original Image”.
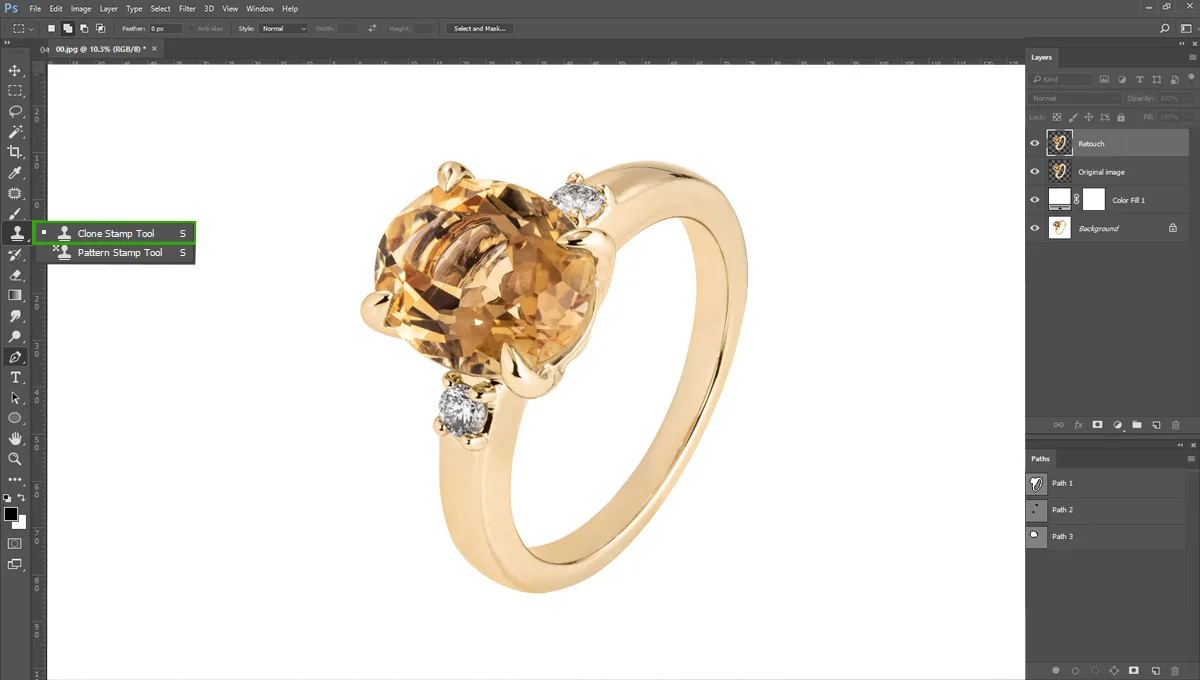
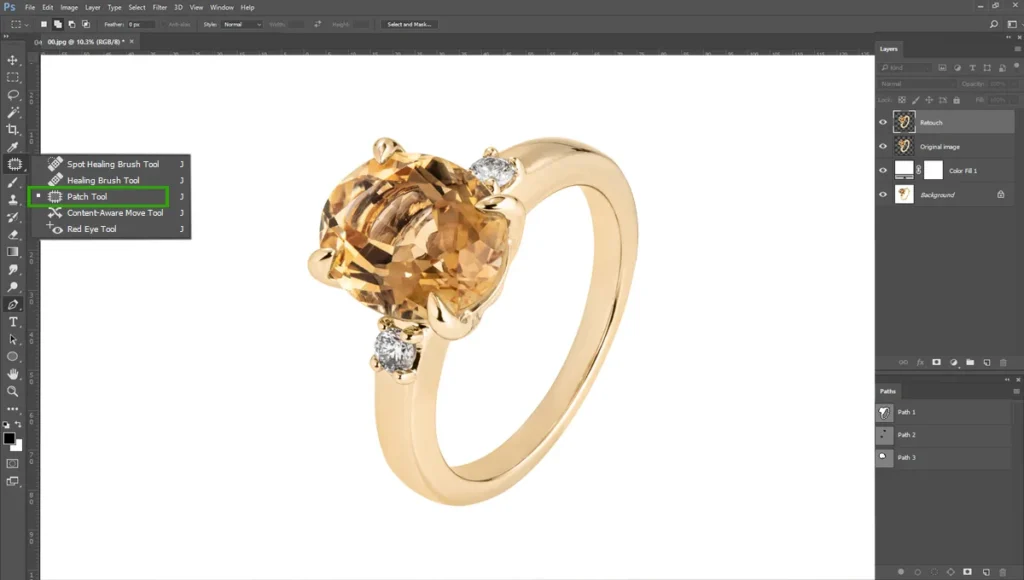
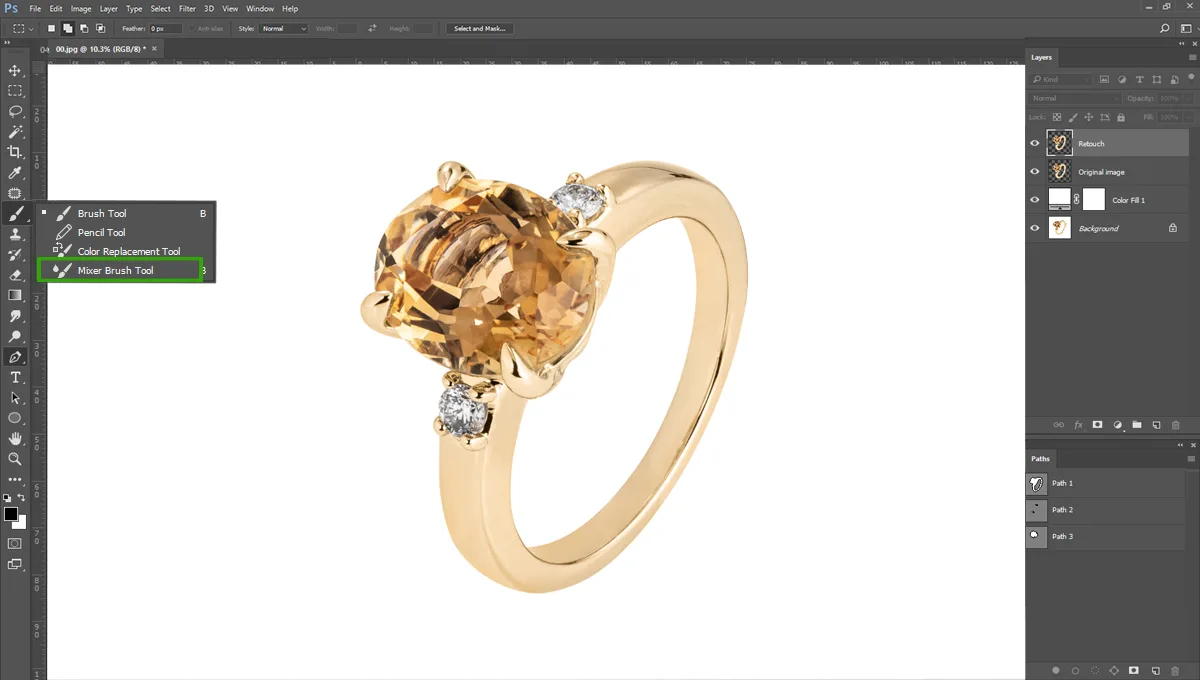
Step 02: Cleaning Dust, Scratches, and Blemishes
Jewelry photos are difficult to keep perfectly clean during the photoshoot. Macro lenses capture every single speck of dust, fingerprint, and minor manufacturing flaw.
That’s why we need to do basic jewelry retouching.
We need to remove dust, scratches, and blemishes using Photoshop. The primary goal during this stage is to keep the image looking entirely natural.
Go to “Clone Stamp Tool” and select the good area and replace with dust area.
You can use “Patch Tool” for remove the scratches.
For remove the blemishes, go to “Mixer Brush Tool”. You can use “Dodge Tool or Burn Tool” for remove blemishes.
But remember, the metal should look clean and polished, but not plastic or artificially rendered. Leave some natural gradients and subtle structural lines intact to prove to the buyer that they are looking at a real, tangible object.
Cleaning dust is fine, but it won’t give you that ‘million-dollar’ look. For that, we have to do something interesting: we’re going to replace the metal entirely.
Step 03: High-polish Metal
Now, we reach the part that separates the amateurs from the pros. If you’ve ever wondered how high-end brands get that flawless, mirror-like finish on their gold… this is the secret.
High-polish metal is very crucial for jewelry retouching. Because metals behave like mirrors, often picking up color casts from the camera lens, the photographer’s clothing, or the studio walls.
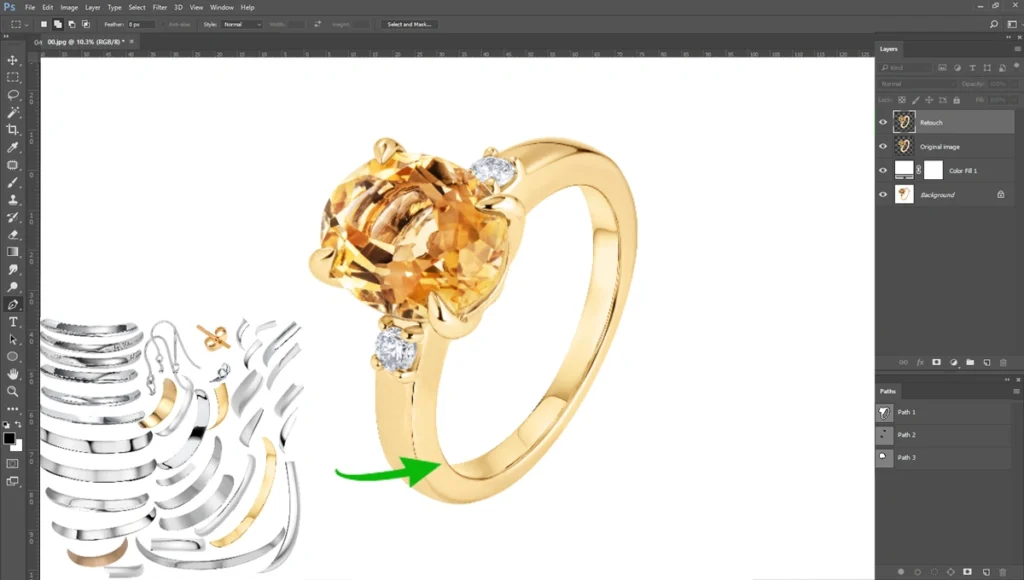
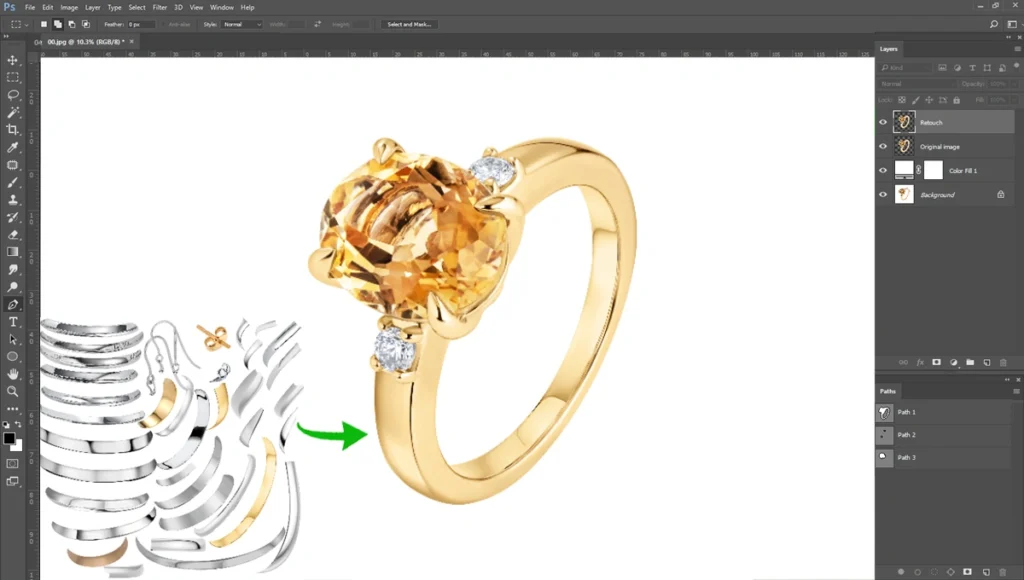
We are going to replace the metal with template metals. If you wanted to make metal high polish, you would have to use the Brush tool a lot. For this reason, I have created high-polished metal in separate pieces.
These metals are easy to replace with current metals. In my whole jewelry retouching career, I have gathered these metals. I’m going to share these. Here are they- high polish jewelry metal.
Simply open these metals in Photoshop and replaced with these current metals. Like below-
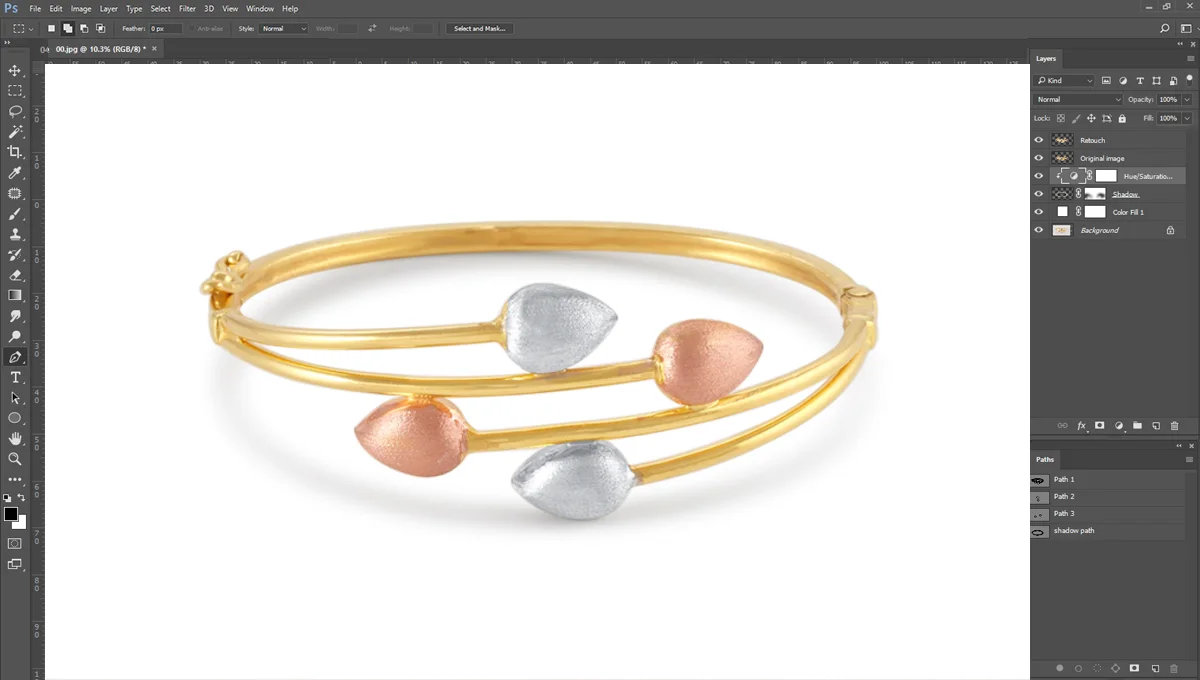
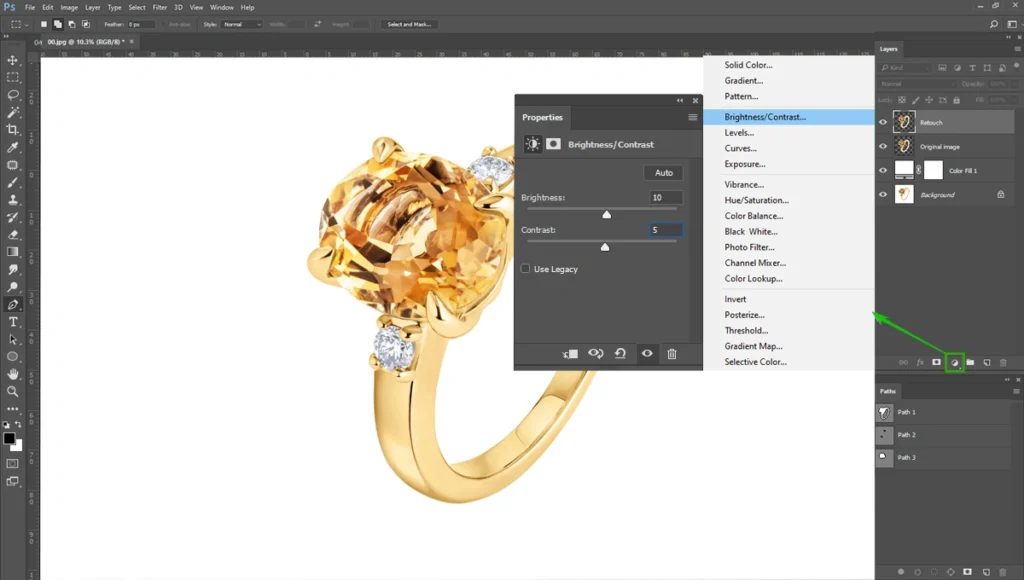
Step 04: Color Correction and Color Improvement
After finishing the high-polish metal replacement, we have to do color correction.
First, go to “Levels” and set the parameter to 0.96

After that, select the “Brightness/Contrast”. Set the parameter Brightness: 10 and Contrast: 5. You can adjust these based on the metal darkness.
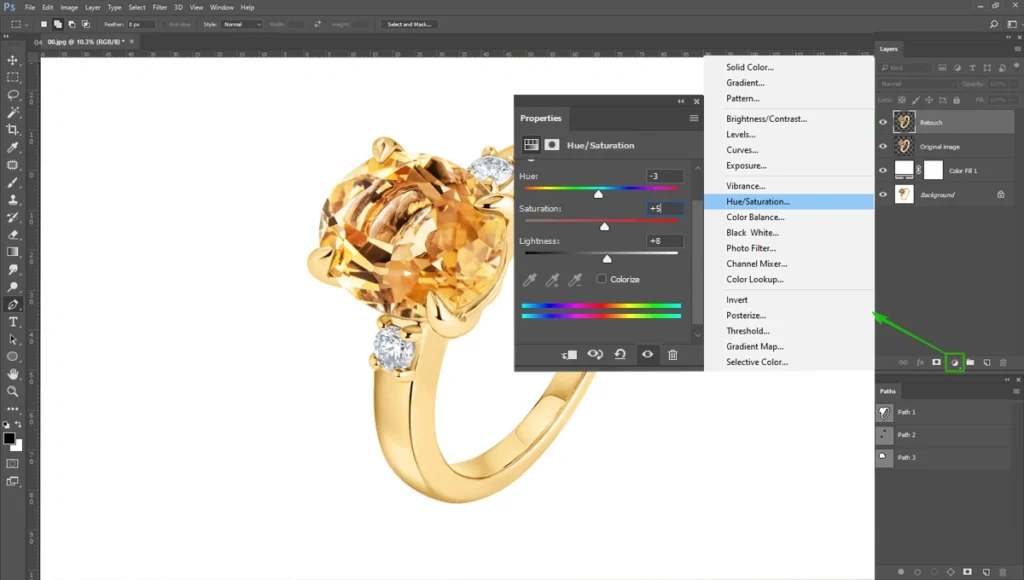
Now go to “Hue/Saturation” and set the parameter Hue: -3, Saturation: +5, Lightness: +8. These parameters are good for gold jewelry.
Now go to “Color Balance” and set the parameter Cyan: +5, Magenta: 1, Yellow: -5. If your jewelry has a good gold color, you don’t have to use it.

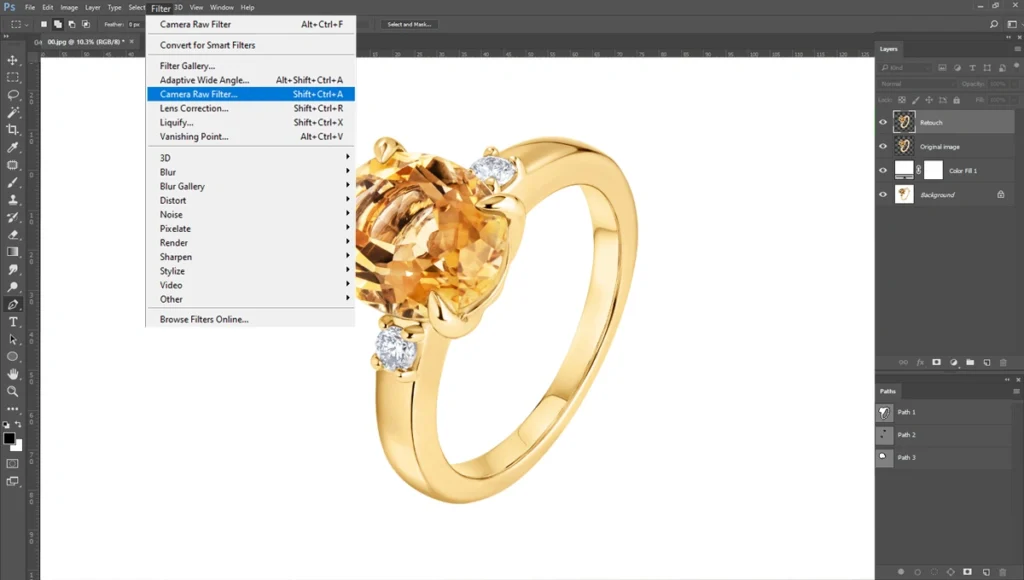
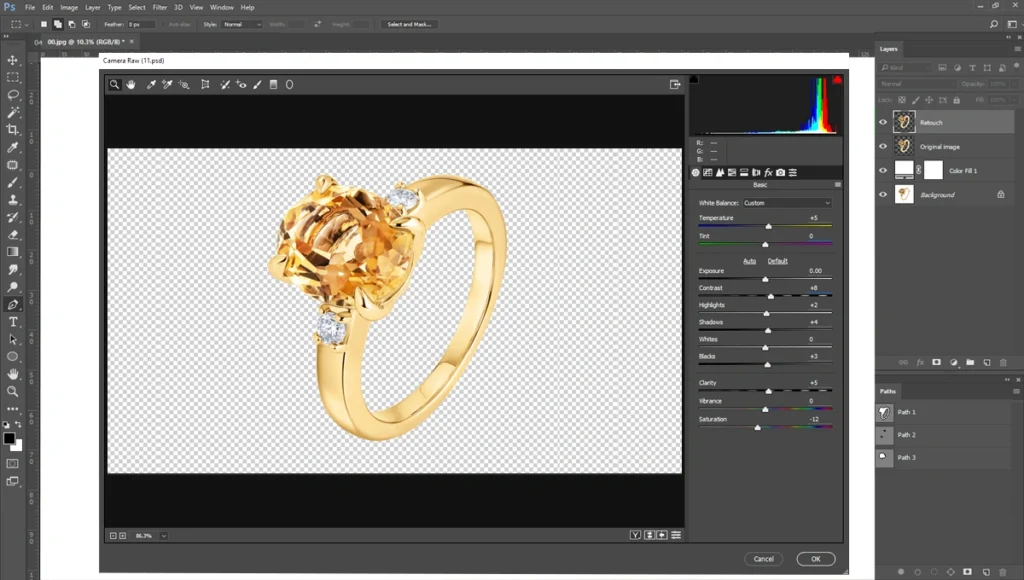
Step 05: Camera Raw and Sharpen
We need to make the jewelry a little bit of a highlight for high polish. Before that, you can convert the layer into a “Smart Object”. Now go to “Filter” and select “Camera Raw Filter” and select the parameter as shown in the image below-
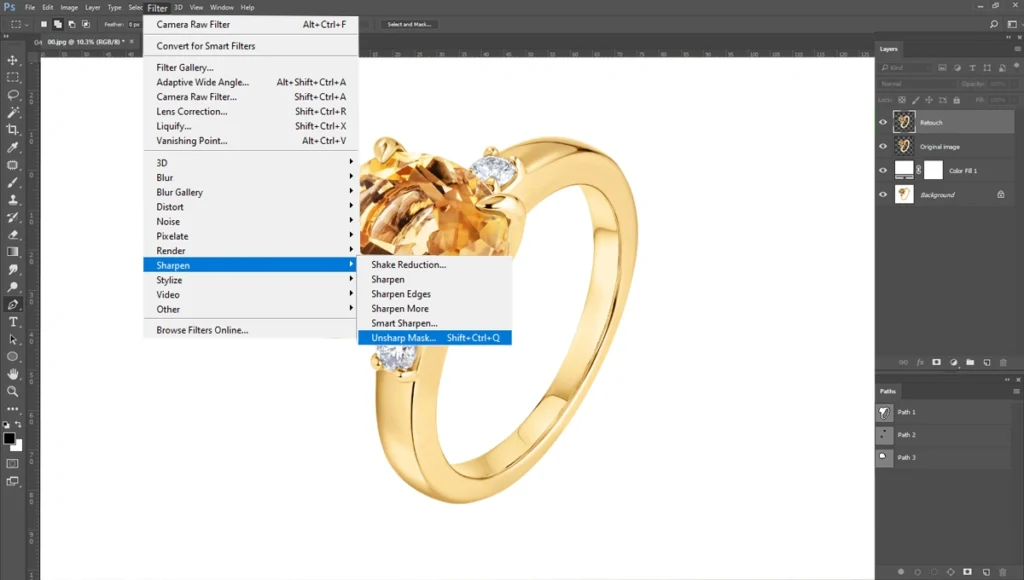
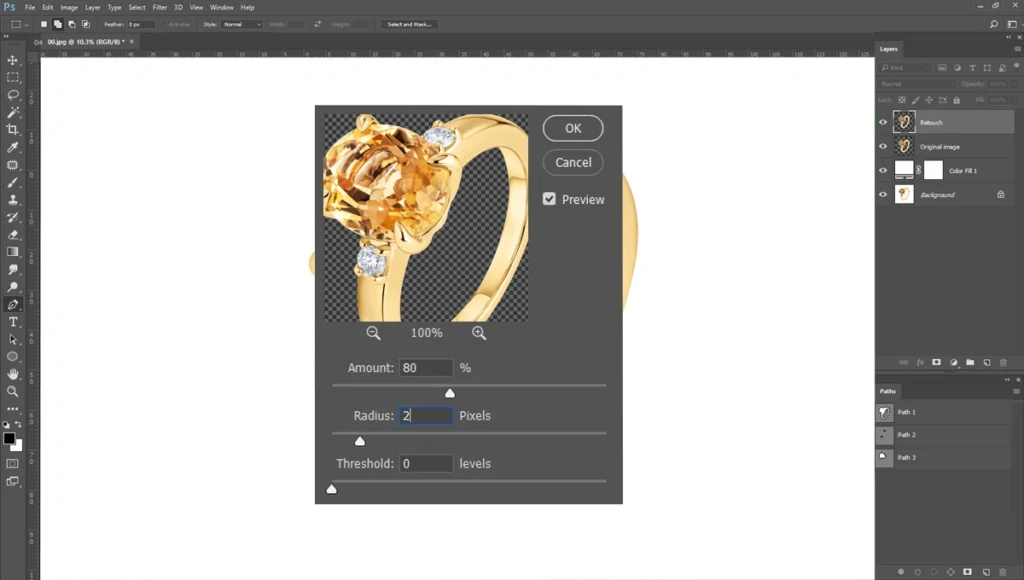
Finally, we need to make the jewelry sharp. Go to “Filter” and select “Sharpen > Unsharp Mask”. Select the parameter Amount: 80 and Radius: 2.
Step 06: Creating Realistic Shadows
A piece of jewelry floating in a sea of pure white space looks unnatural and unappealing. The jewelry needs a realistic shadow underneath. The type of shadow you create should depend on the brand’s specific style guide, ranging from a soft, diffused drop shadow to a sharp, mirror-like reflection.
It’s easy to create a realistic shadow. Create a path like the image below and create a black layer.

Now go to “Filter > Blur > Gaussian Blur”. You’ll see, the shadow becomes blurred and softened.
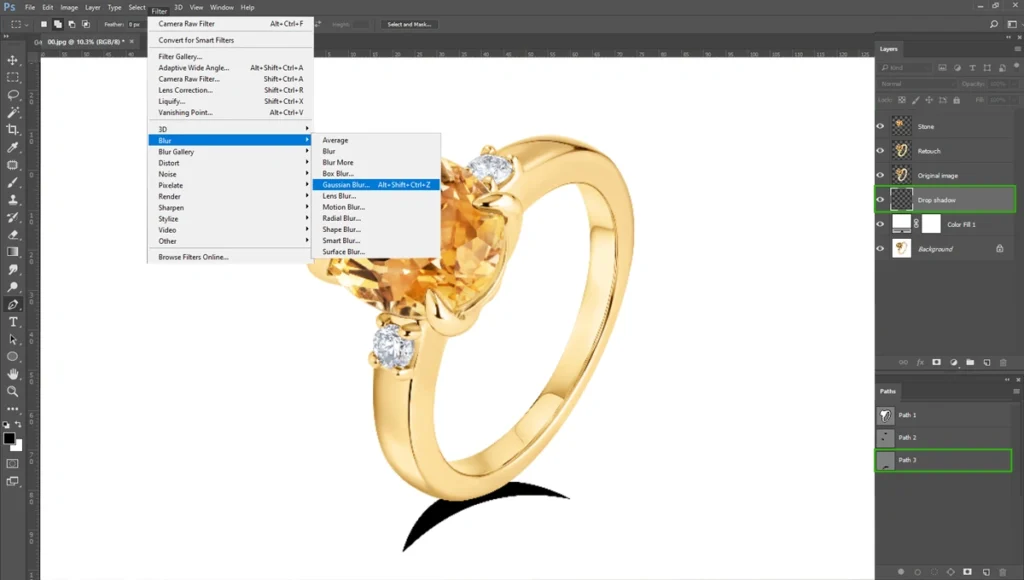
Adjust with this using the “Brush Tool”.
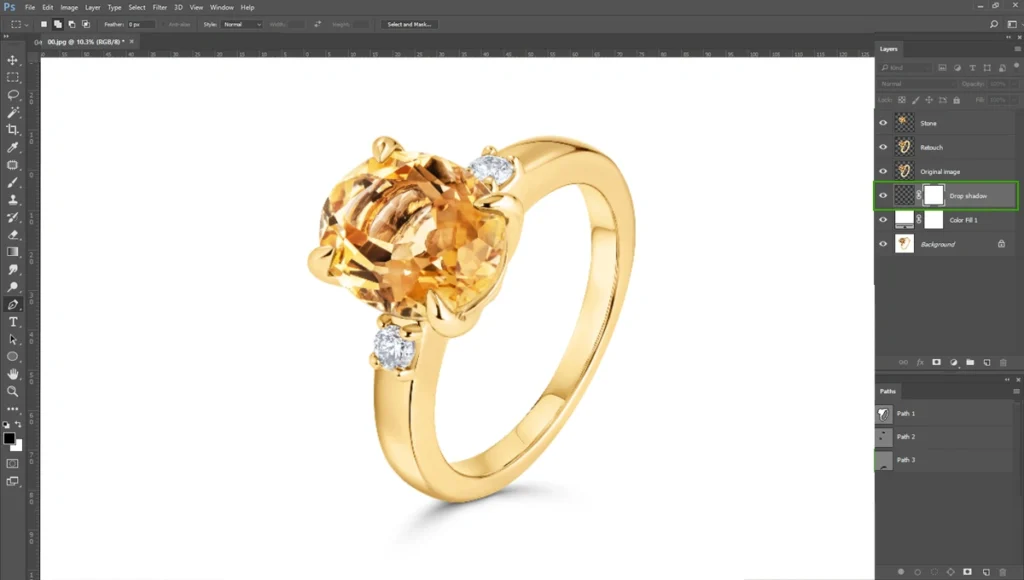
Remember, a mismatch between the highlights on the product and the placement of the shadow will immediately register as fake to the human eye.
Things to Avoid While Doing Jewelry Photo Editing in Photoshop
Sometimes, experienced editors can fall into bad habits. One of the most common mistakes is over-smoothing the metals.
While it is tempting to blur out every single gradient to achieve a uniform look, doing so removes the realistic texture of the material. The resulting image looks like a computer-generated 3D render rather than a photograph of physical jewelry.
Unrealistic gemstone colors present another major risk. It can be fun to push the vibrancy sliders, but over-saturating stones is a dangerous practice. If the digital image showcases a glowing, neon-blue sapphire, but the customer receives a dark, navy-colored stone in the mail, they will return the product and leave a negative review. Honesty in color representation is paramount.
Inconsistent shadows also plague many e-commerce sites. Using generic, flat, or heavy black shadows can ruin the high-end illusion of the product. Take the time to create nuanced, layered shadows with soft feathering at the edges.
Finally, never make the mistake of ignoring brand guidelines. A dark, moody edit might look beautiful, but if the e-commerce brand’s visual identity relies on bright, airy, minimalist photography, your edit will be useless to them. Always align your final output with the client’s established aesthetic.
Tips for Efficient Jewelry Photo Editing
Here are some tips to improve your jewelry photo editing.
- One of the best ways to speed up your workflow is to use Photoshop Actions. Actions allow you to record repetitive tasks, such as setting up your base layer structure, applying a pure white background, or executing standard curve adjustments. With the click of a single button, you can apply minutes of work in less than a second, ensuring a fast turnaround.
- Batch processing is another essential technique for high-volume shoots. If you have fifty images of rings shot under the exact same lighting conditions, you can synchronize your basic color correction and exposure adjustments across the entire batch. Applying consistent edits across a styled shoot not only saves time but also maintains uniformity across the product catalog.
- Maintain open communication with your clients or brand managers throughout the editing process. Provide work-in-progress shots early on to ensure your styling and color grading fit their target audience. This collaborative approach prevents massive, time-consuming revisions later.
Conclusion
High-end jewelry photo plays a critical role in brand strategy. It makes it stand out in a heavily saturated online marketplace.
High-resolution, perfectly styled images are not just a nice bonus; they are the fundamental engine driving customer engagement, building brand trust, and securing repeat business. When you invest in meticulous retouching, you invest directly in the perceived value of your products.
If you are struggling with editing, reach out to our team today and explore customizable editing packages. We are ready to handle your retouching project at an affordable price.