Have you ever noticed that, in e-commerce websites, product photos are in a beautiful background and aligned?
Well, it’s for transparent background in all product photos. High-quality product photos directly impact conversion rates.
When a potential customer lands on the website, they just don’t see the product photos. They feel the texture or examine the product closely. If the photos are cluttered, poorly lit, or distracting, customers will jump to the competitor.
That’s why transparent or white background is important for an e-commerce website.
One of the most valuable skills you can learn now is how to remove the background in Photoshop. Photoshop has two amazing tools called “Clipping Path and Quick Selection”. By using these tools, you can easily remove any product photo’s background and create a clean and minimal background.
A transparent background gives you the flexibility to place the product anywhere. You can seamlessly drop it onto a bright promotional banner, a subtle pastel backdrop for social media, or a pure white canvas for a major online marketplace.
At Glossy Retouching, we are processing thousands of product photos with a transparent background. We are using Photoshop to remove the background. One thing I have noticed is that photo editors don’t care much about product edges, while they do care about transparent backgrounds.
It’s important to check the product edges while removing the background. If it isn’t, then the product will look dark on the edges.
In this blog, I’m going to share my exact step-by-step workflow for making a transparent background in Photoshop. If you follow these steps and practice, I’m confident that you’ll become an expert in transparent background or removing background.
But, before getting into the tutorial, let’s first understand why you need transparent background.
Why Do You Need Transparent Background in Product Photos?
When I dived into product photo editing, I quickly realized that the background is just as important as the product itself. You’ll also realize that.
A transparent background offers several distinct advantages that can dramatically improve the digital marketing and online social sales strategy.
Here are some reasons why you need to learn transparent background in Photoshop-
Marketplace Guideline
You have already seen that big online marketplaces like Amazon, eBay, or Google Shopping websites use product photos are in white background. Even their infographic photos are also on a white background. These platforms want to provide a consistent, distraction-free shopping experience to their user.
As a result, they highly recommended product images in pure white or with a fully transparent background.
If you failed to maintain these guidelines, then the product listing can be suppressed or removed entirely. So, make sure product photos remain transparent background in all major channels.
You can easily export a version with a transparent background and another with a solid white background, covering all your bases without needing to reshoot the product.
Maximizing Image Versatility
A transparent background acts as a blank slate. When you remove the original setting from your photograph, you unlock endless creative possibilities.
E-commerce owners and digital marketers love transparent PNG files because they provide ultimate versatility.
You can take a single product image and use it in dozens of different ways. Place the product on a vibrant, branded color background for an Instagram post. Drop it into a complex seasonal promotional banner for your website homepage. Because the background is transparent, the product will blend naturally into any new environment you choose, saving you countless hours of extra photography work.
Eliminating Visual Clutter
Human attention spans are shorter than ever. When a shopper looks at your product photo, their focus should remain 100 percent on the item brands are selling.
Stray shadows, wrinkled fabrics, or random objects in the background of a photo create visual clutter. This clutter distracts the eye and dilutes the impact of your product.
Transparent background can strip away all unnecessary noise. It forces the viewer to look at the details, colors, and shape of your product. This clean, minimalist approach looks highly professional.
How to Make the Background Transparent in Photoshop (Step-by-Step)
Adobe Photoshop provides several powerful tools to help make the background transparent. Even if you are a complete beginner, you can achieve professional results by following this simple, step-by-step walkthrough.
In these steps, I’ll walk you through with two Photoshop tools-
- Quick Selection Tool
- Clipping Path Tool (Pen Tool)
The first tool is kind of easy to use. But the Pen tool is kind of complex. If you wanted better results, you should move with the Pen Tool. So, first, here are the Quick Selection tool steps-
Step 1: Open Your Image and Unlock the Background Layer
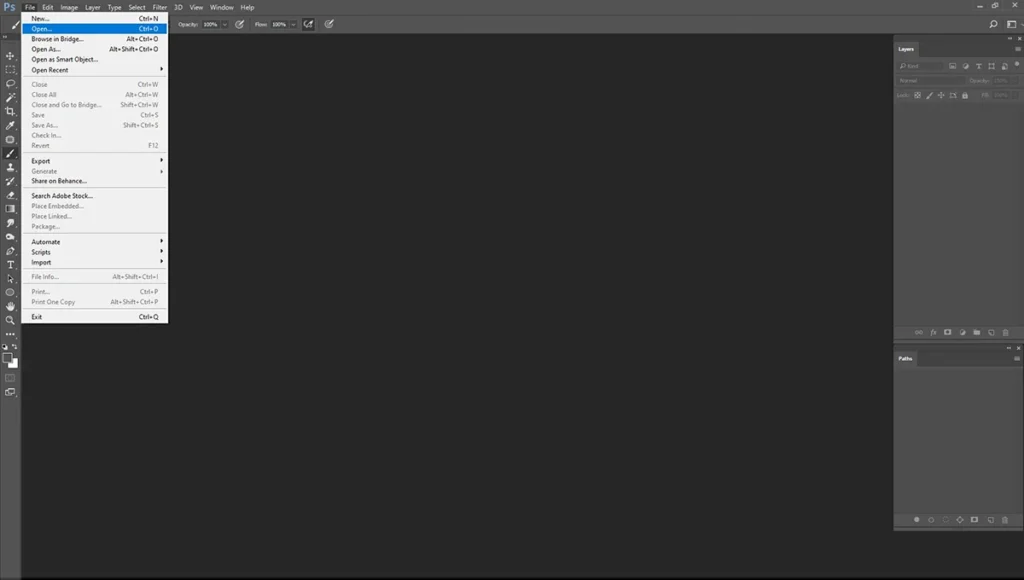
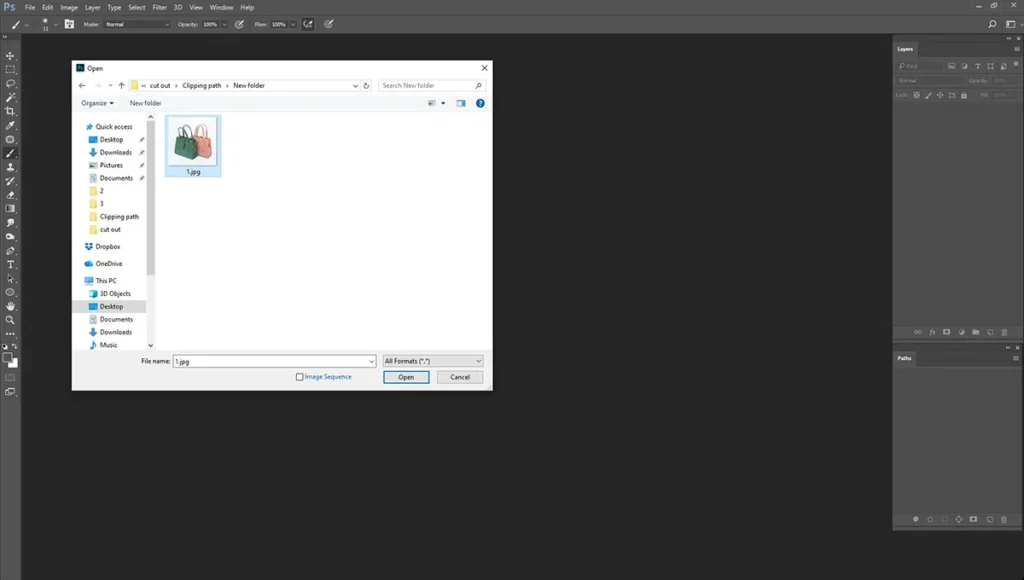
Start by launching Adobe Photoshop on your computer. Go to the top menu, click on “File,” and select “Open.” Find the product photo you want to edit and open it in the software.
When you open a standard image, Photoshop usually locks it as a “Background” layer. You will see a small padlock icon next to the layer name in the Layers panel on the right side of your screen. A locked background layer does not support transparency.
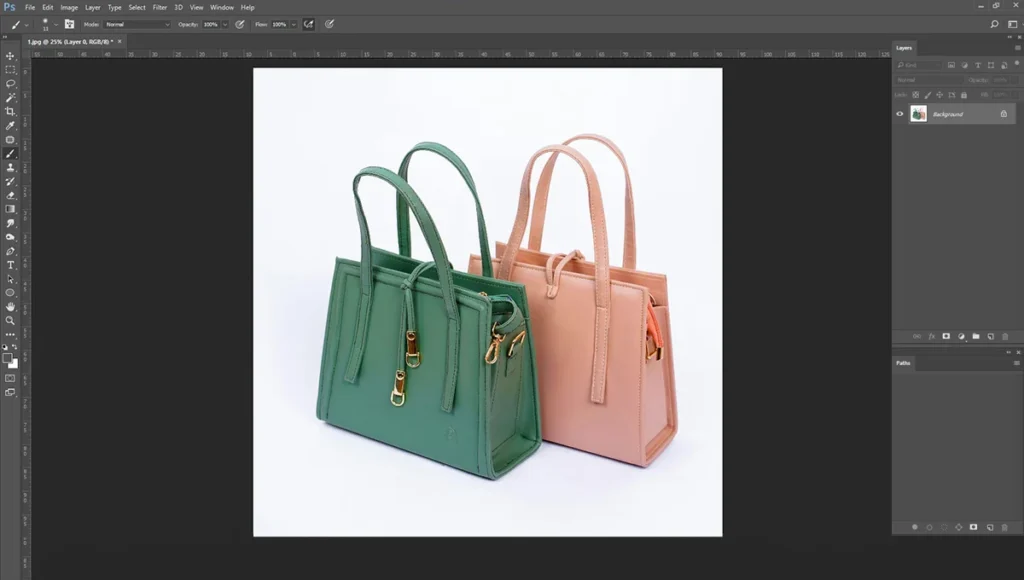
To enable transparency, simply click on the padlock icon once. The layer name will change from “Background” to “Layer 0.” Now, you are ready to start editing.
Step 2: Highlight the Product with Selection Tools
Your next goal is to tell Photoshop which part of the image you want to keep. You need to create a selection around your product. Photoshop offers multiple tools for this job, but the “Select Subject” and “Magic Wand” tools are excellent for beginners.
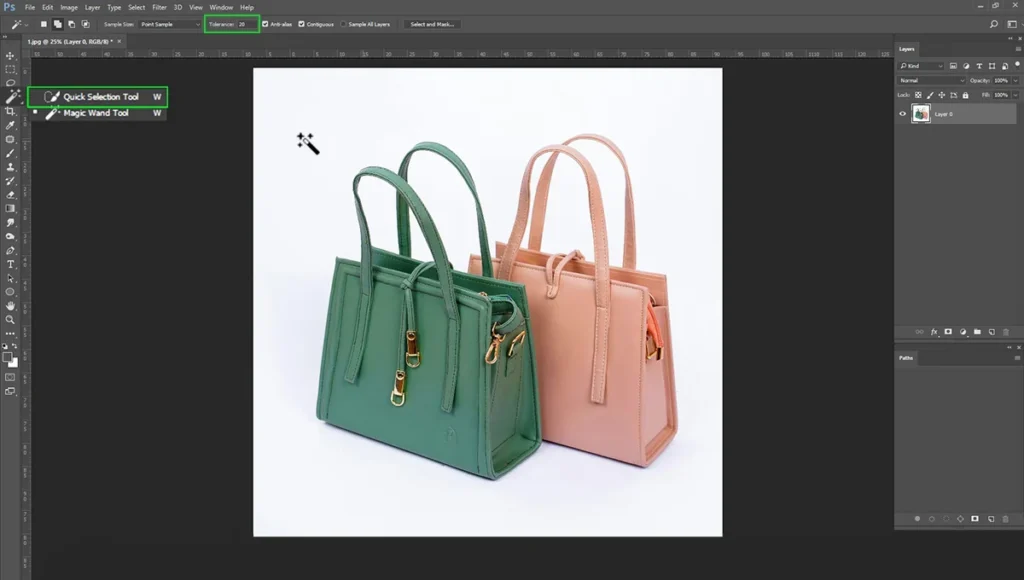
If you have a modern version of Photoshop, the “Select Subject” feature is incredibly fast. Choose the “Quick Selection Tool” from your toolbar. Look at the top options bar and click the button that says “Select Subject.” Photoshop’s artificial intelligence will analyze your image and automatically draw a selection outline around your product.
If the automatic selection misses a few spots, you can use the “Magic Wand” or the “Quick Selection Tool” to manually add or subtract from the selected area.
Take your time to ensure the outline closely hugs the edges of your product.
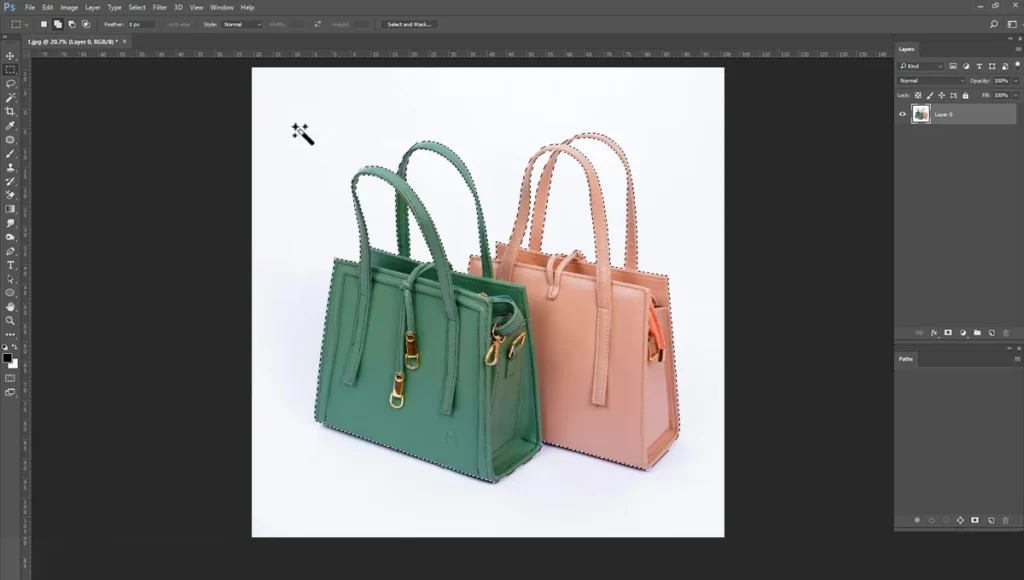
Step 3: Refine the Edges in the Select and Mask Workspace
An initial selection is rarely perfect. To make the cut-out look realistic, you must refine the edges. With your selection still active, click on the “Select and Mask” button located in the top options bar.

This action opens a new workspace dedicated to fine-tuning selections. Here, you can adjust various sliders to improve your edge quality. This step is especially crucial if your product has complex, fuzzy areas like hair, fur, or frayed fabric. Use the “Refine Edge Brush Tool” from the left panel of this workspace to brush over these tricky areas.
Photoshop will automatically calculate the difference between the complex texture and the background, giving you a much cleaner result.
Step 4: Delete the Background and Reveal Transparency
Once you are happy with your refined edges, click “OK” to exit the Select and Mask workspace. You should now see the precise selection outline around your product.
Right now, your product is selected. If you hit the delete key, you will erase the product itself. To remove the background instead, you need to invert your selection. Go to the top menu, click on “Select,” and choose “Inverse.” Now, the background is selected rather than the product.
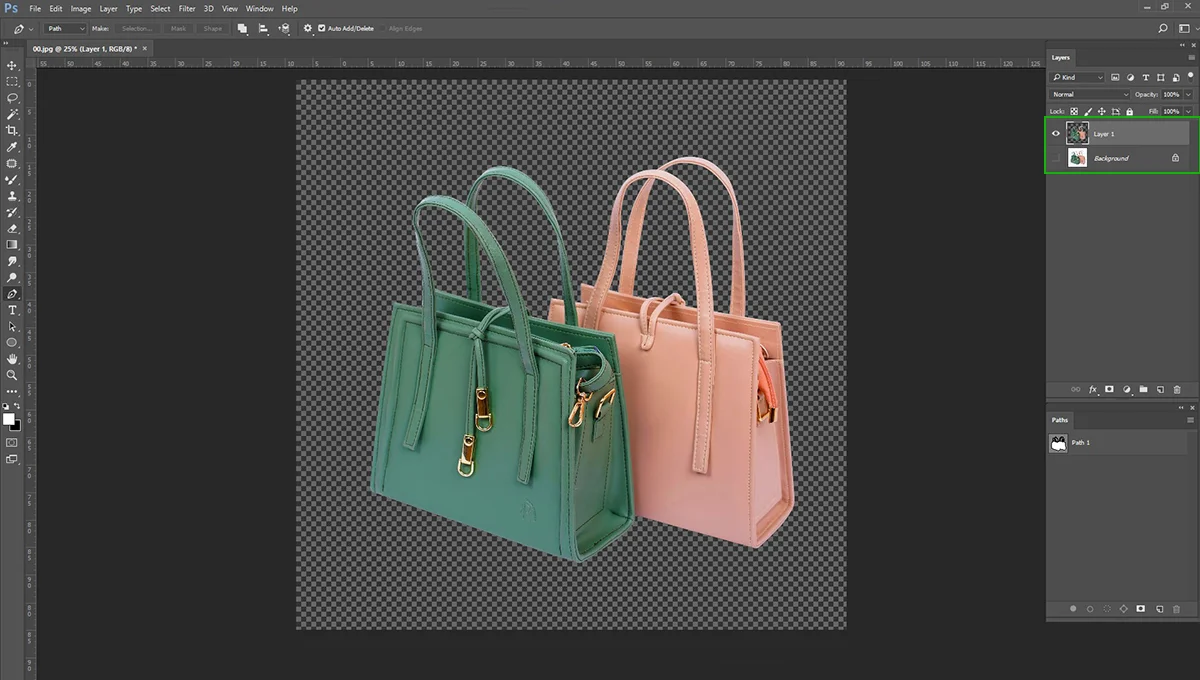
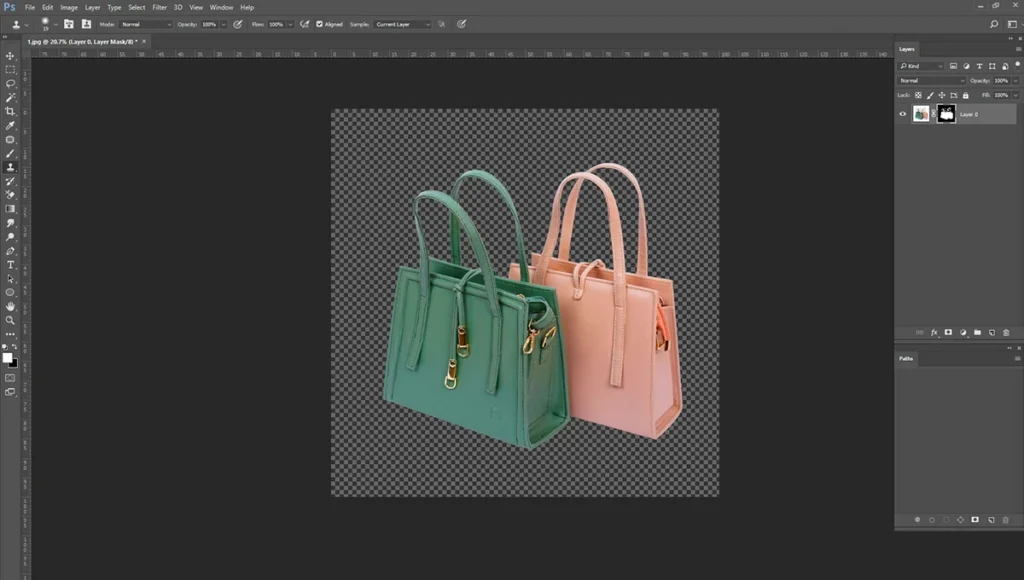
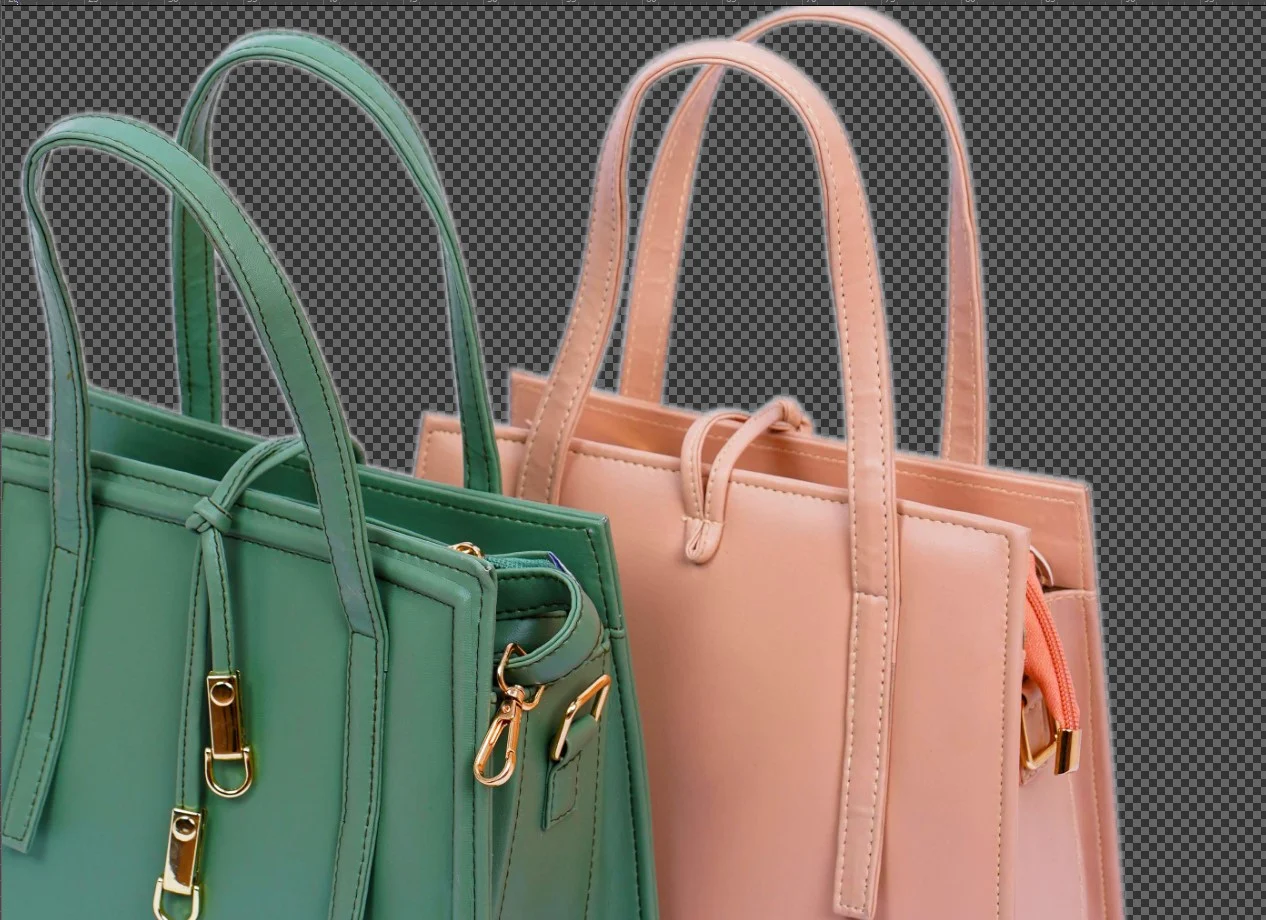
Press the “Delete” or “Backspace” key on your keyboard. The background will instantly disappear. In its place, you will see a gray and white checkerboard pattern. In Photoshop, this checkerboard pattern represents absolute transparency.
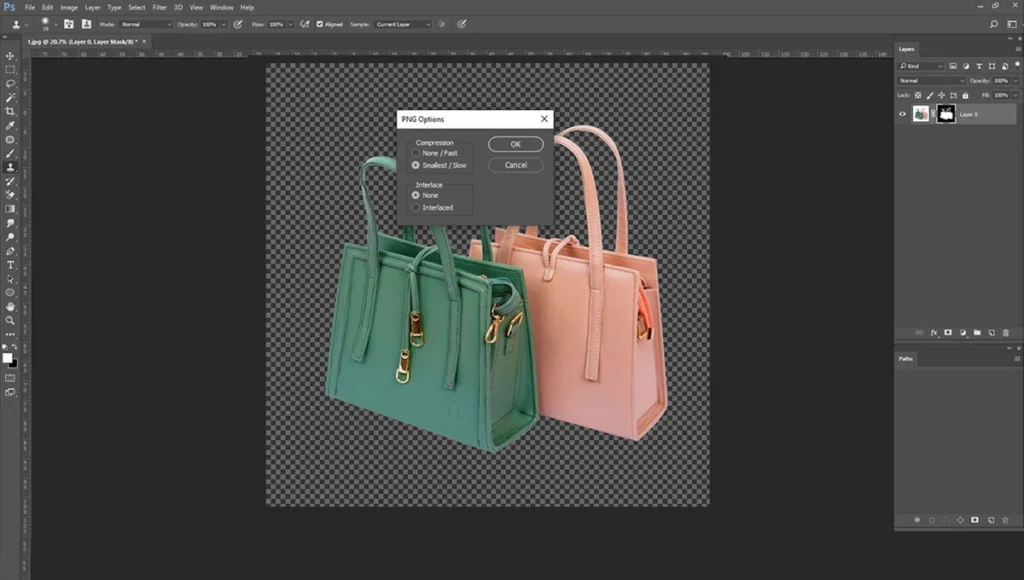
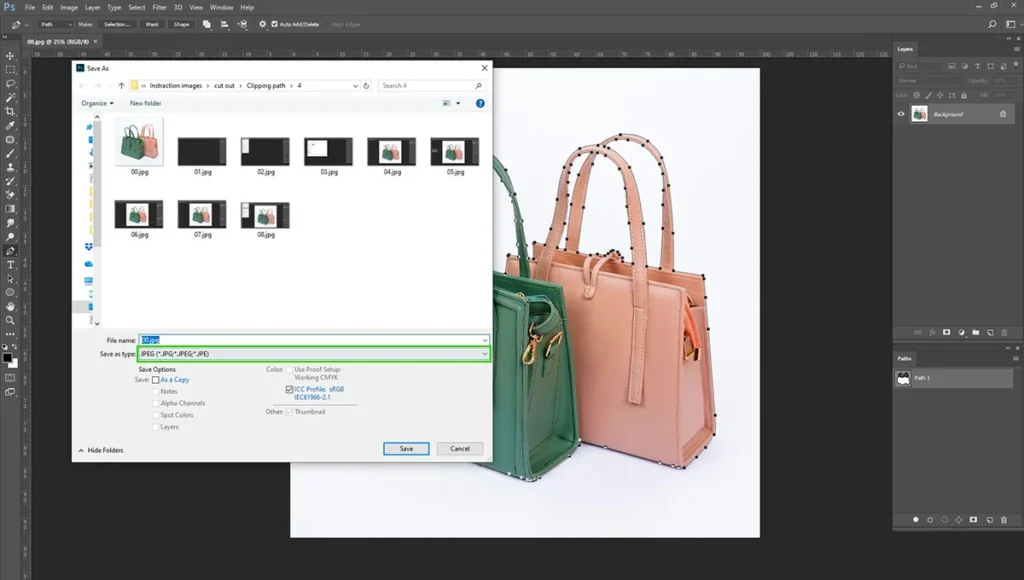
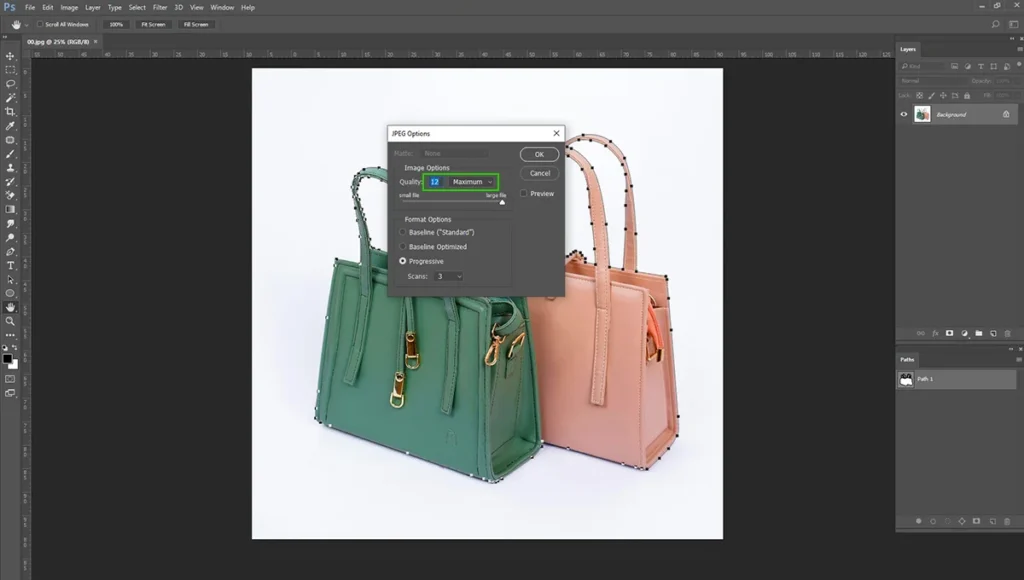
Step 5: Export Correctly as a PNG File
All your hard work will be wasted if you do not save the file correctly. This is a crucial step. You must save your newly edited image in a format that supports transparency.
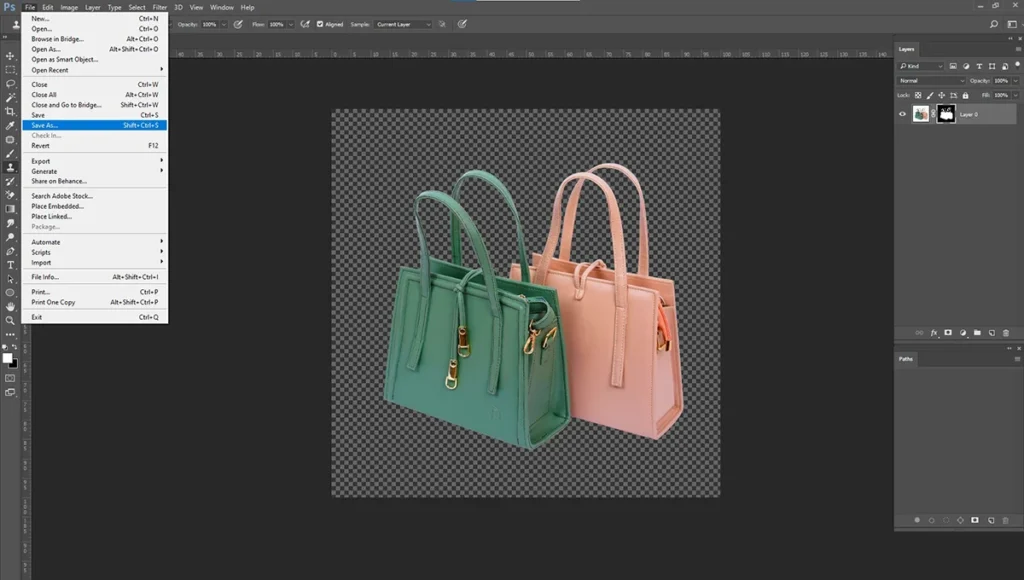
Go to “File,” then select “Export,” and choose “Export As.” In the format dropdown menu, select “PNG.” Make sure the box labeled “Transparency” is checked. Click “Export,” name your file, and save it to your computer. JPEGs do not support transparency. If you save the file as a JPEG, Photoshop will automatically fill the transparent areas with a solid white box, undoing your effort.
Now we have our steps to make transparent background in Photoshop by using the Quick Selection Tool. Now let’s move into the Pen tool.
Step 1: Open Your Image in Photoshop
Same with the process. Open Adobe Photoshop. Go to the “File” menu and click “Open”. There will be a dialogue box, and you’ll see your photo. Select the photo and click “Open” in the bottom right side. You’ll send your photo as an open file in Photoshop.
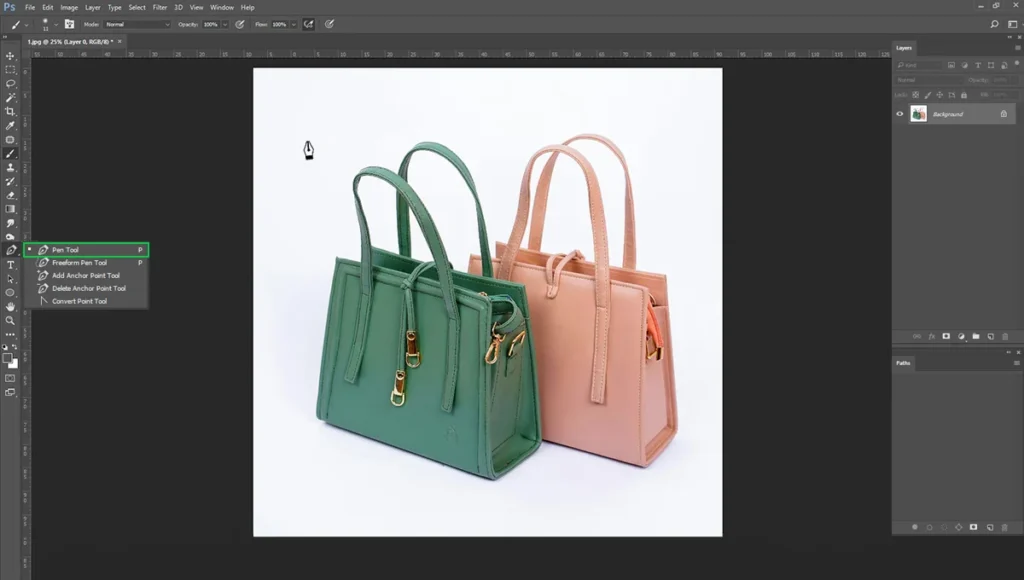
Step 2: Select Pen Tool from the Toolbar
Now select the “Pen Tool” from the left side toolbar. You can easily set the tool by pressing “P”. After selecting the tool, you’ll see the pen tool. Then got the ‘Windows” menu and selected the “Paths” option. Select that option and place it on the left side (like the screenshot below).
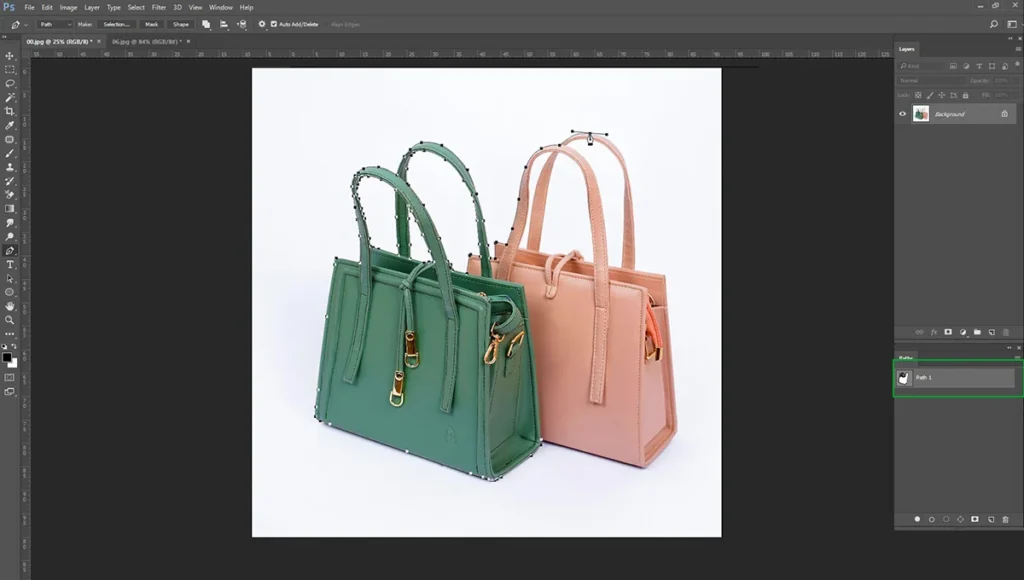
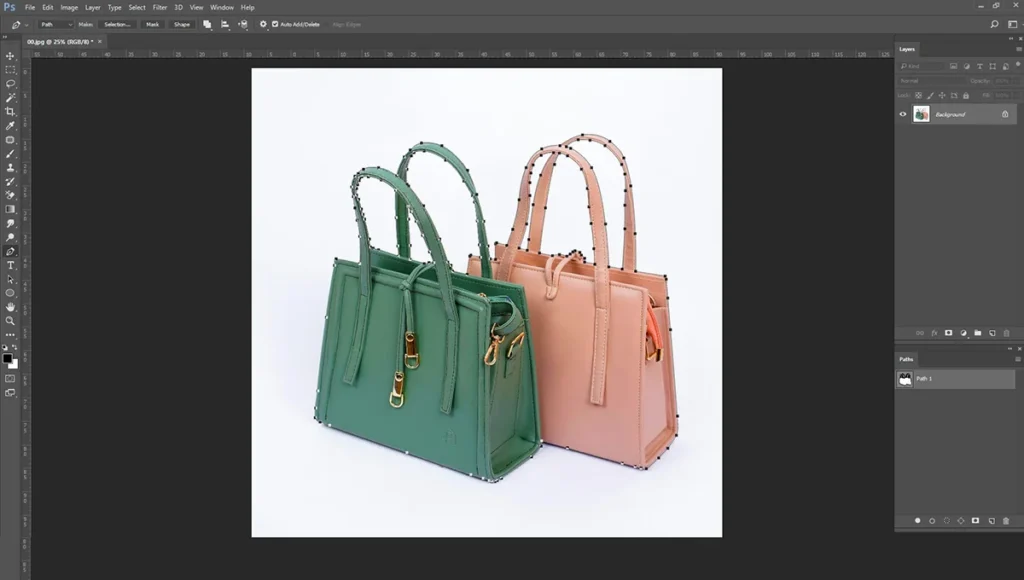
Now, in the “Paths” bar, click ‘Create New Path’. You’ll send a new path in the “Paths” bar. After that, start doing the clipping path all around the product. Firstly, it’ll look complicated. But after a couple of practices, it’ll be easy. Remember to keep the eye on the point arrow in the pen tool. Keep it through the product.
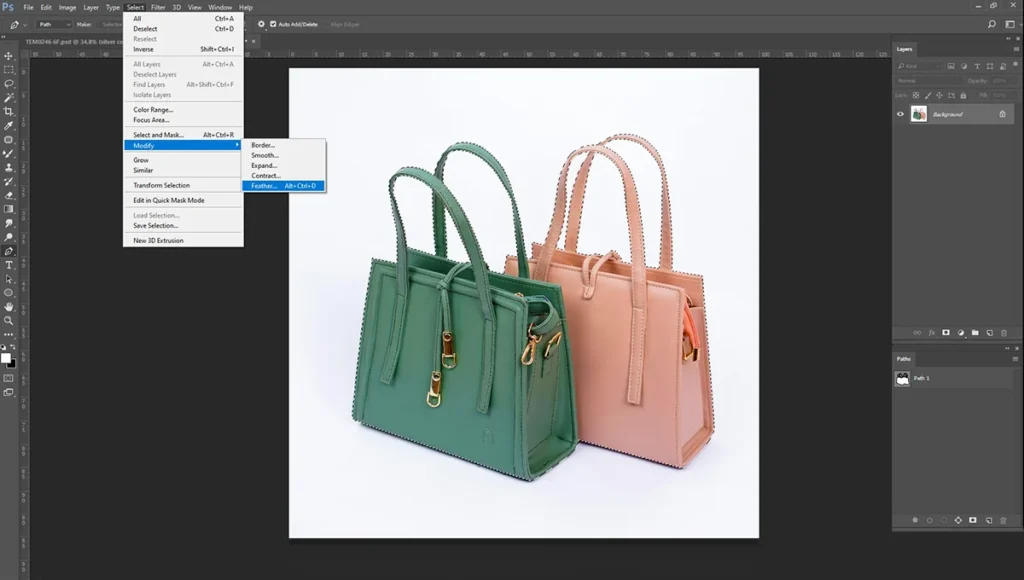
Step 3: Layer Option
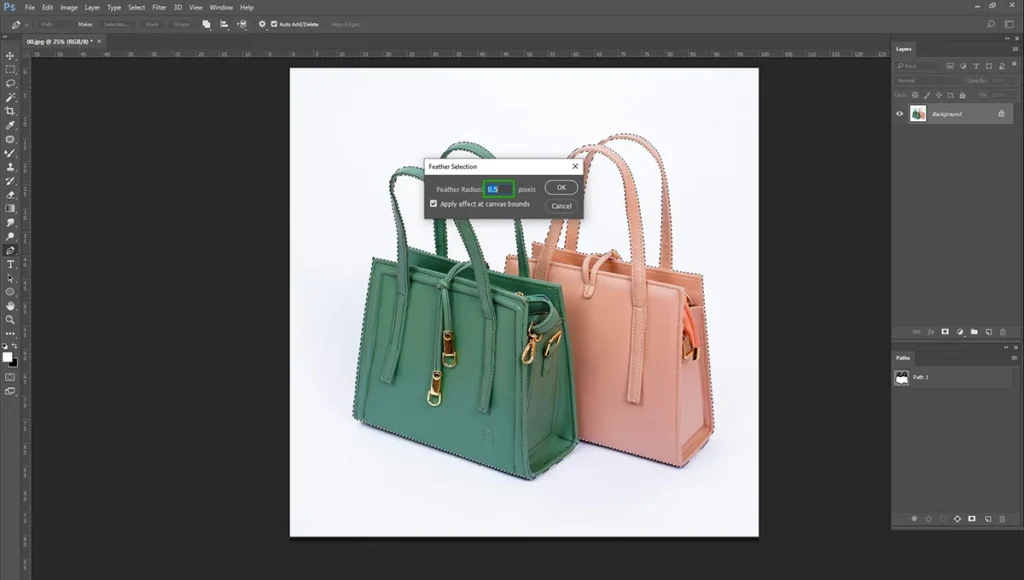
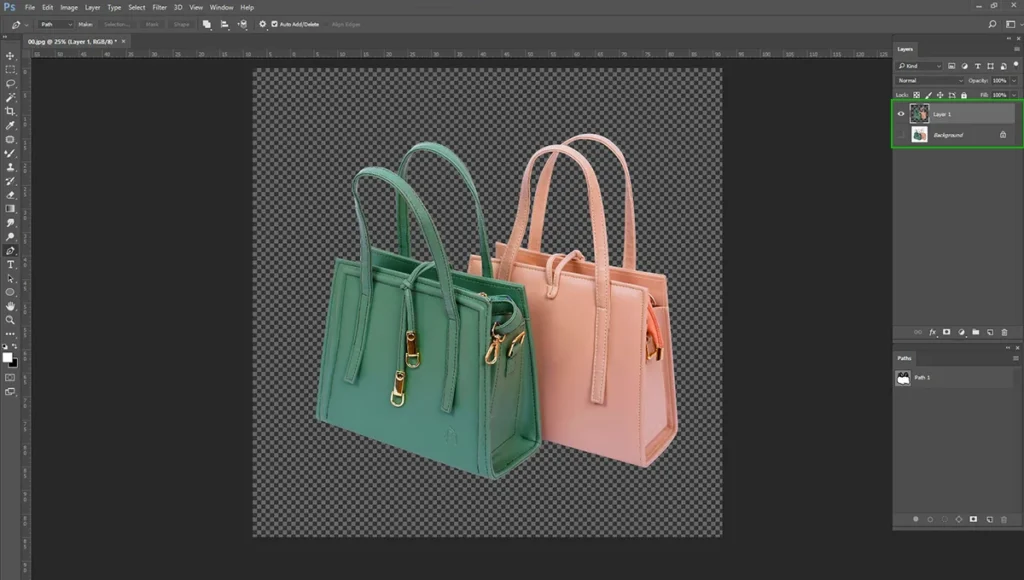
After finishing the clipping path, select the path in selection mode. You can easily select by Ctrl+Enter. After selecting the path, go to “Select” and then “Modify>Feather” and set the feather radius to 0.50. After that, select “Ctrl+J”, and you’ll see a transparent background layer in the Layer bar. Then turn off the eye of the “Background” layer.
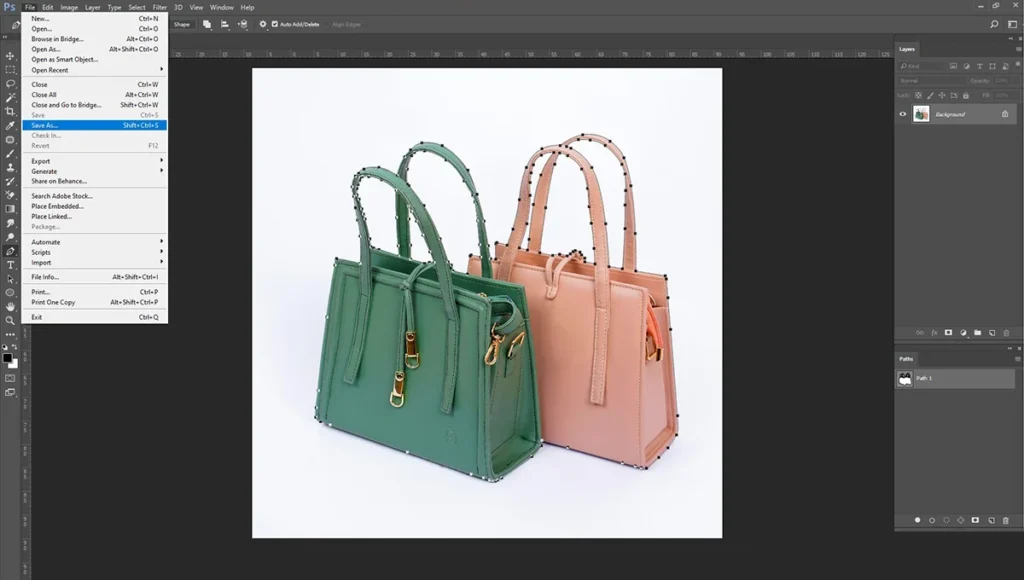
Step 4: Export the File
After turning on the eye of the layer, just save the file as a PNG. Same as you have done in the “Quick Selection Tool” section. Now your photo is ready with transparent background. Remember again, don’t save the photo in JPG format. Because it now supports a transparent background.
Things to Avoid While Creating a Transparent Background
Creating transparent background in Photoshop gets easier with practice.
However, beginners often run into a few common pitfalls. Keep these editing mistakes in mind so you can avoid them.
The Halo Effect
One of the most common issues in product photo editing is the “halo effect”. I have faced this issue when I started working on transparent background. This happens when a thin, noticeable line of the original background color remains around the outer edge of the product.
A halo effect can make photos look fake. It was poorly cut out from the background.

To fix this, you need to adjust your mask settings. When you are in the “Select and Mask” workspace, look for the slider labeled “Shift Edge.” By moving this slider slightly to the left (into the negative numbers), you tell Photoshop to shrink the selection inward just a tiny bit.
Feathering Edges
When trying to get rid of jagged edges, many beginners rely too heavily on the “Smooth” and “Feather” sliders in the Select and Mask workspace.
While these tools are helpful in moderation, using them too much will ruin your image.
Over-smoothing removes the natural texture and sharpness from the edges of your product. Feathering the edge too much creates a soft, blurry glow around the item.
To solve this problem, always select the feather radius between 0.5 and 1 pixel.
Saving in the Wrong File Format
We have already covered up this issue in the last step. You must avoid saving your final product photo editing work in the wrong file format.
If you spend twenty minutes perfectly masking a product, and then you save that file as a standard JPEG, the image will flatten. The JPEG format physically cannot hold transparent pixel data. It will automatically replace your beautiful checkerboard transparency with a solid white box.
Always double-check your export settings and ensure you are saving as a PNG file when you need the background to remain transparent.
Conclusion
Clean, professional product cut-outs are essential for online sales success. They remove visual distractions, comply with strict marketplace guidelines, and give you the ultimate flexibility to design stunning promotional graphics.
Knowing how to create a transparent background in Photoshop gives you a massive advantage in the competitive e-commerce landscape.
The more you practice, the faster and more precise you will become. If you want to speed up your workflow even further, you can outsource to us.
We are Clipping path and Jewelry retouching services provider. We work with many photographers and e-commerce brands to manage their photo editing. Just, simply fill out the contact us page, and we’ll get back to you.